The main screen of the Donation tab presents a list of every donation record in your account with basic information about each donation with the option of selecting to view the donation details for more information. In this article you will learn how to Add a donation, Modify a donation, Delete a donation, Delete multiple donations and Export donations.
Adding a Donation
From the Donations tab
1. You can add a Donation from this tab by selecting Add Donation in the top right corner of the screen.
 Add donation from Donations Tab
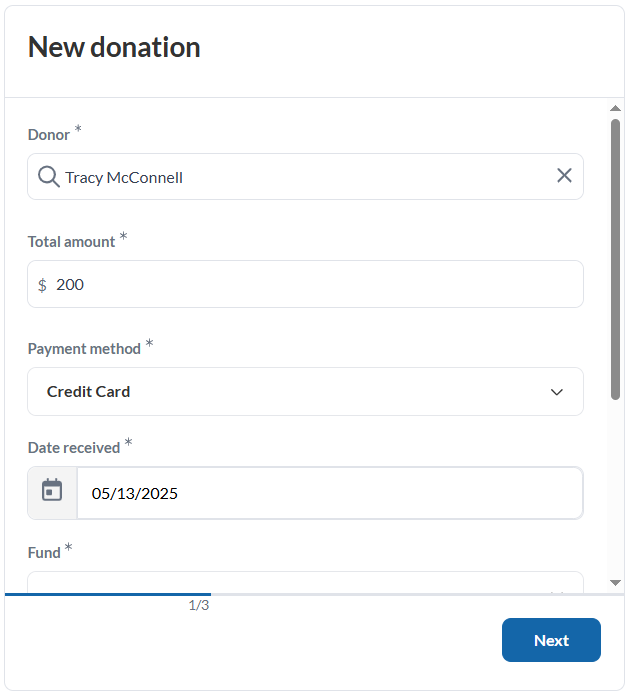
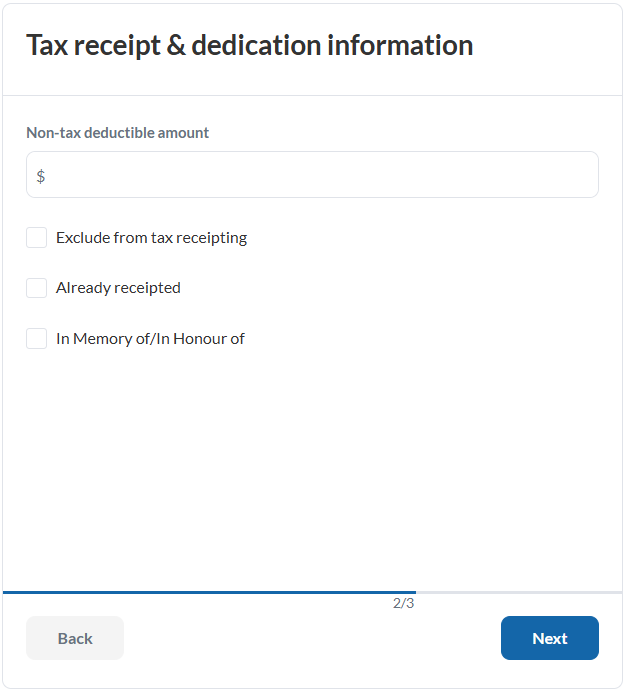
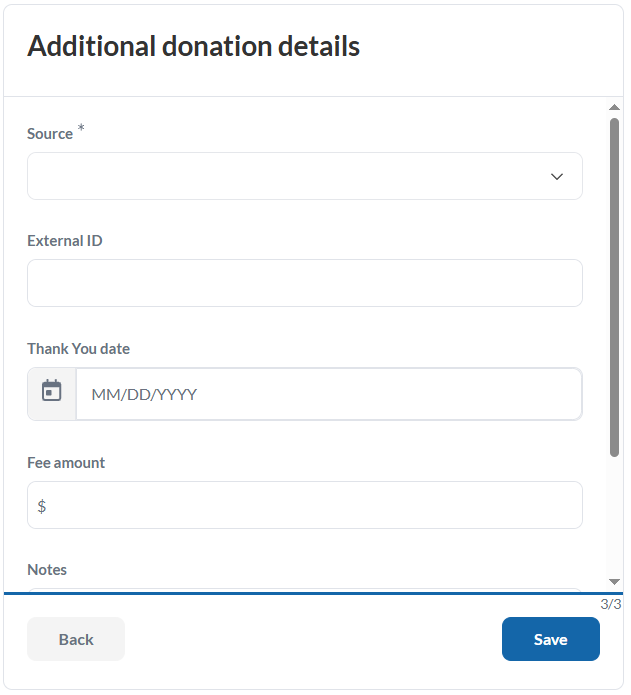
2. Fill out the mandatory and necessary fields on the three-step form and select Save.
New donation: Donor and donation information such as amount, date received, fund, etc.
Tax receipt & dedication information: Include dedication or whether the donation has already been receipted/is excluded from receipting.
Additional donation details: Donation source, fee amount, additional notes.


From a Contact Profile
1. Go to the Contacts tab.
2. Use the search function to find and select the contact you'd like to add a donation to.
3. On the contact profile page, click on the Add Donation button.
 Add donation from a Contact Profile
4. The Donor field will be pre-selected with that Contact's name. Complete all required fields on the three-step form, then click Save.

Modifying a Donation
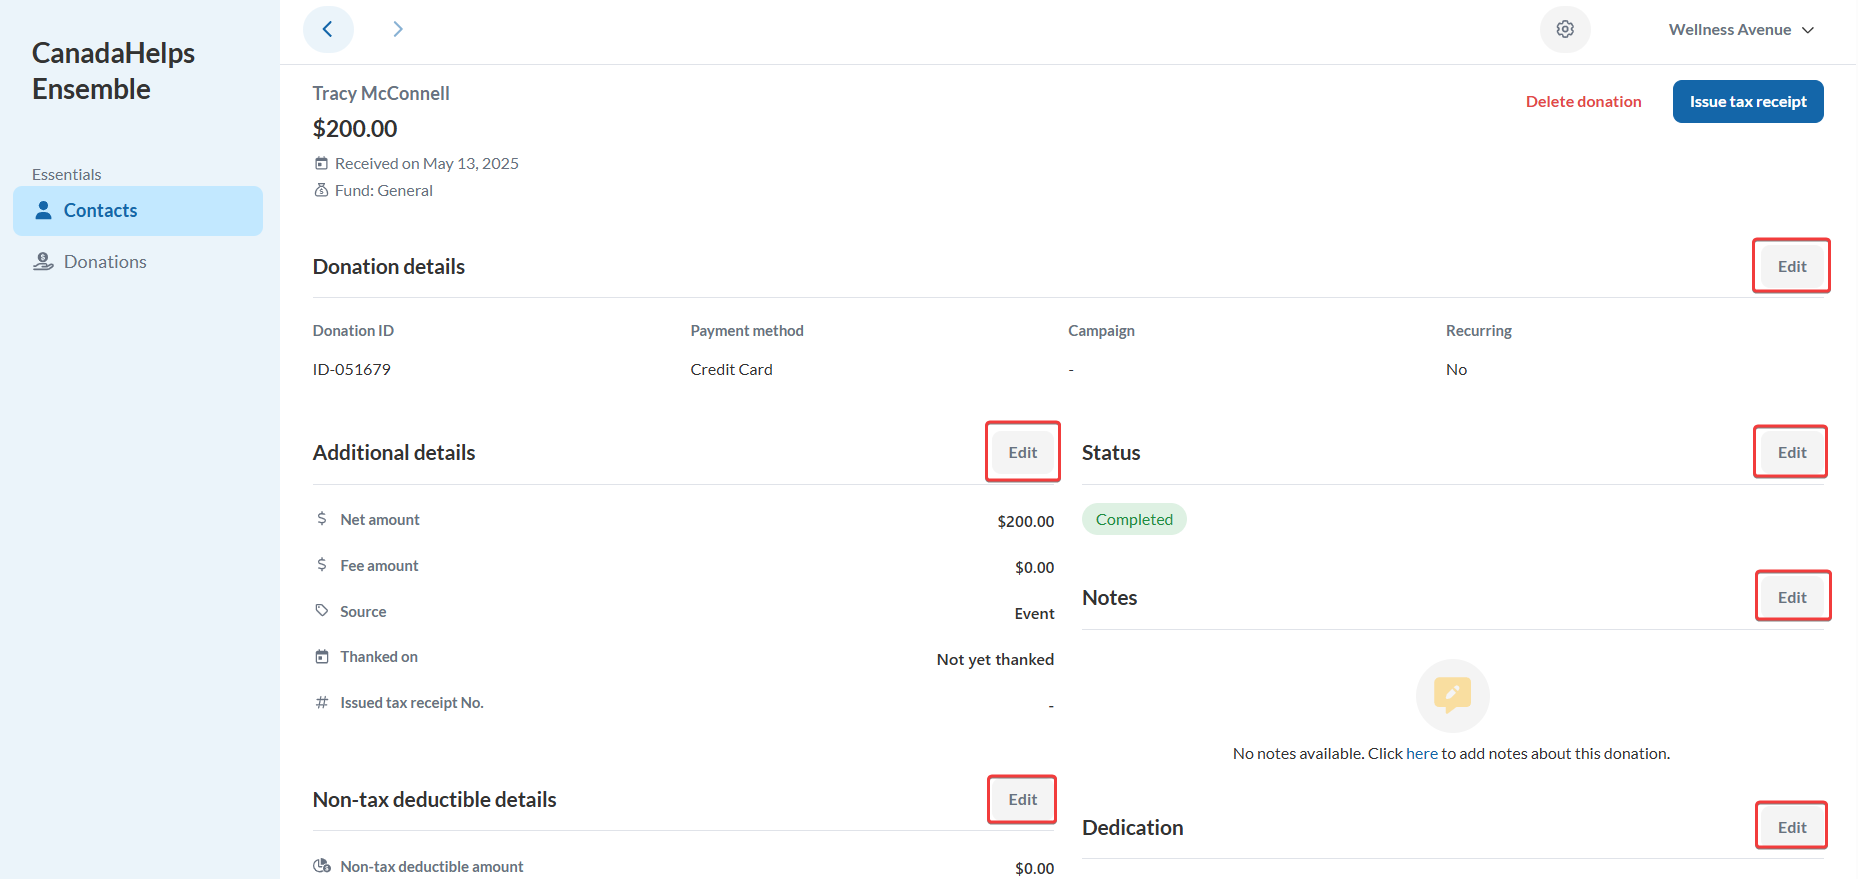
1. Go to the Donation tab.
2. Use the search bar to find and select the donation you wish to edit.
3. On the donation details page, click on any of the Edit options to modify the fields in that section.
 Modifying a donation
 Modifying a donation
5. Once you're finished, click Save to apply your changes.
Deleting a Donation
Please note that once a donation has been receipted, the donation can no longer be deleted.
1. Go to the Donations tab.
2. Use the search bar to find and select the donation you wish to delete.
3. On the donation details page, click on Delete donation located in the top-right corner of the page.
 Delete donation
4. Confirm that you want to delete the donation.
Bulk delete Donations
1. Go to the Donations tab.
2. Use the search function to find and select the donations you’d like to delete.
3. Select the checkboxes next to the donations.
4. Under Bulk Actions, select Delete donations.
 Bulk delete donations
5. Confirm that you want to delete the selected donations.
Exporting Donations
1. Go to the Donations tab.
2. Select the checkboxes next to the Donations you wish to to export. To export all donations, click on Select all # donations that appears once at least 1 donation checkbox has been selected.
3. From the Bulk Actions dropdown menu, choose Export Donations.
4. The exported donations will be download as a .CSV file onto your computer.
 Exporting donations