Donor Management System
This article covers finding your previously-created Groups and Smart Groups. You can also:
- Add, modify, and delete a Group or Smart Group, or
- Manage the Contacts in those Groups & Smart Groups
Viewing All Groups
From the Contacts Tab
1. Go to the Contacts Tab
2. Select Advanced Actions on the top right corner of the screen and then Manage Groups
 Manage Groups
3. On the Manage Groups Page, you will see the following fields and actions:
 Modify Groups
- Hover your cursor to be able to edit the Group Name.
- Press on the “pencil icon” to edit the Group Description.
- See a list of all Contacts in the Group.
- Change the Group Settings. You will also be able to add or remove a Parent Group associated with the Group.
- Press on "More" to Delete the Group.
Note: Smart Groups will be labeled with (Smart Group)
From the Administrative Settings
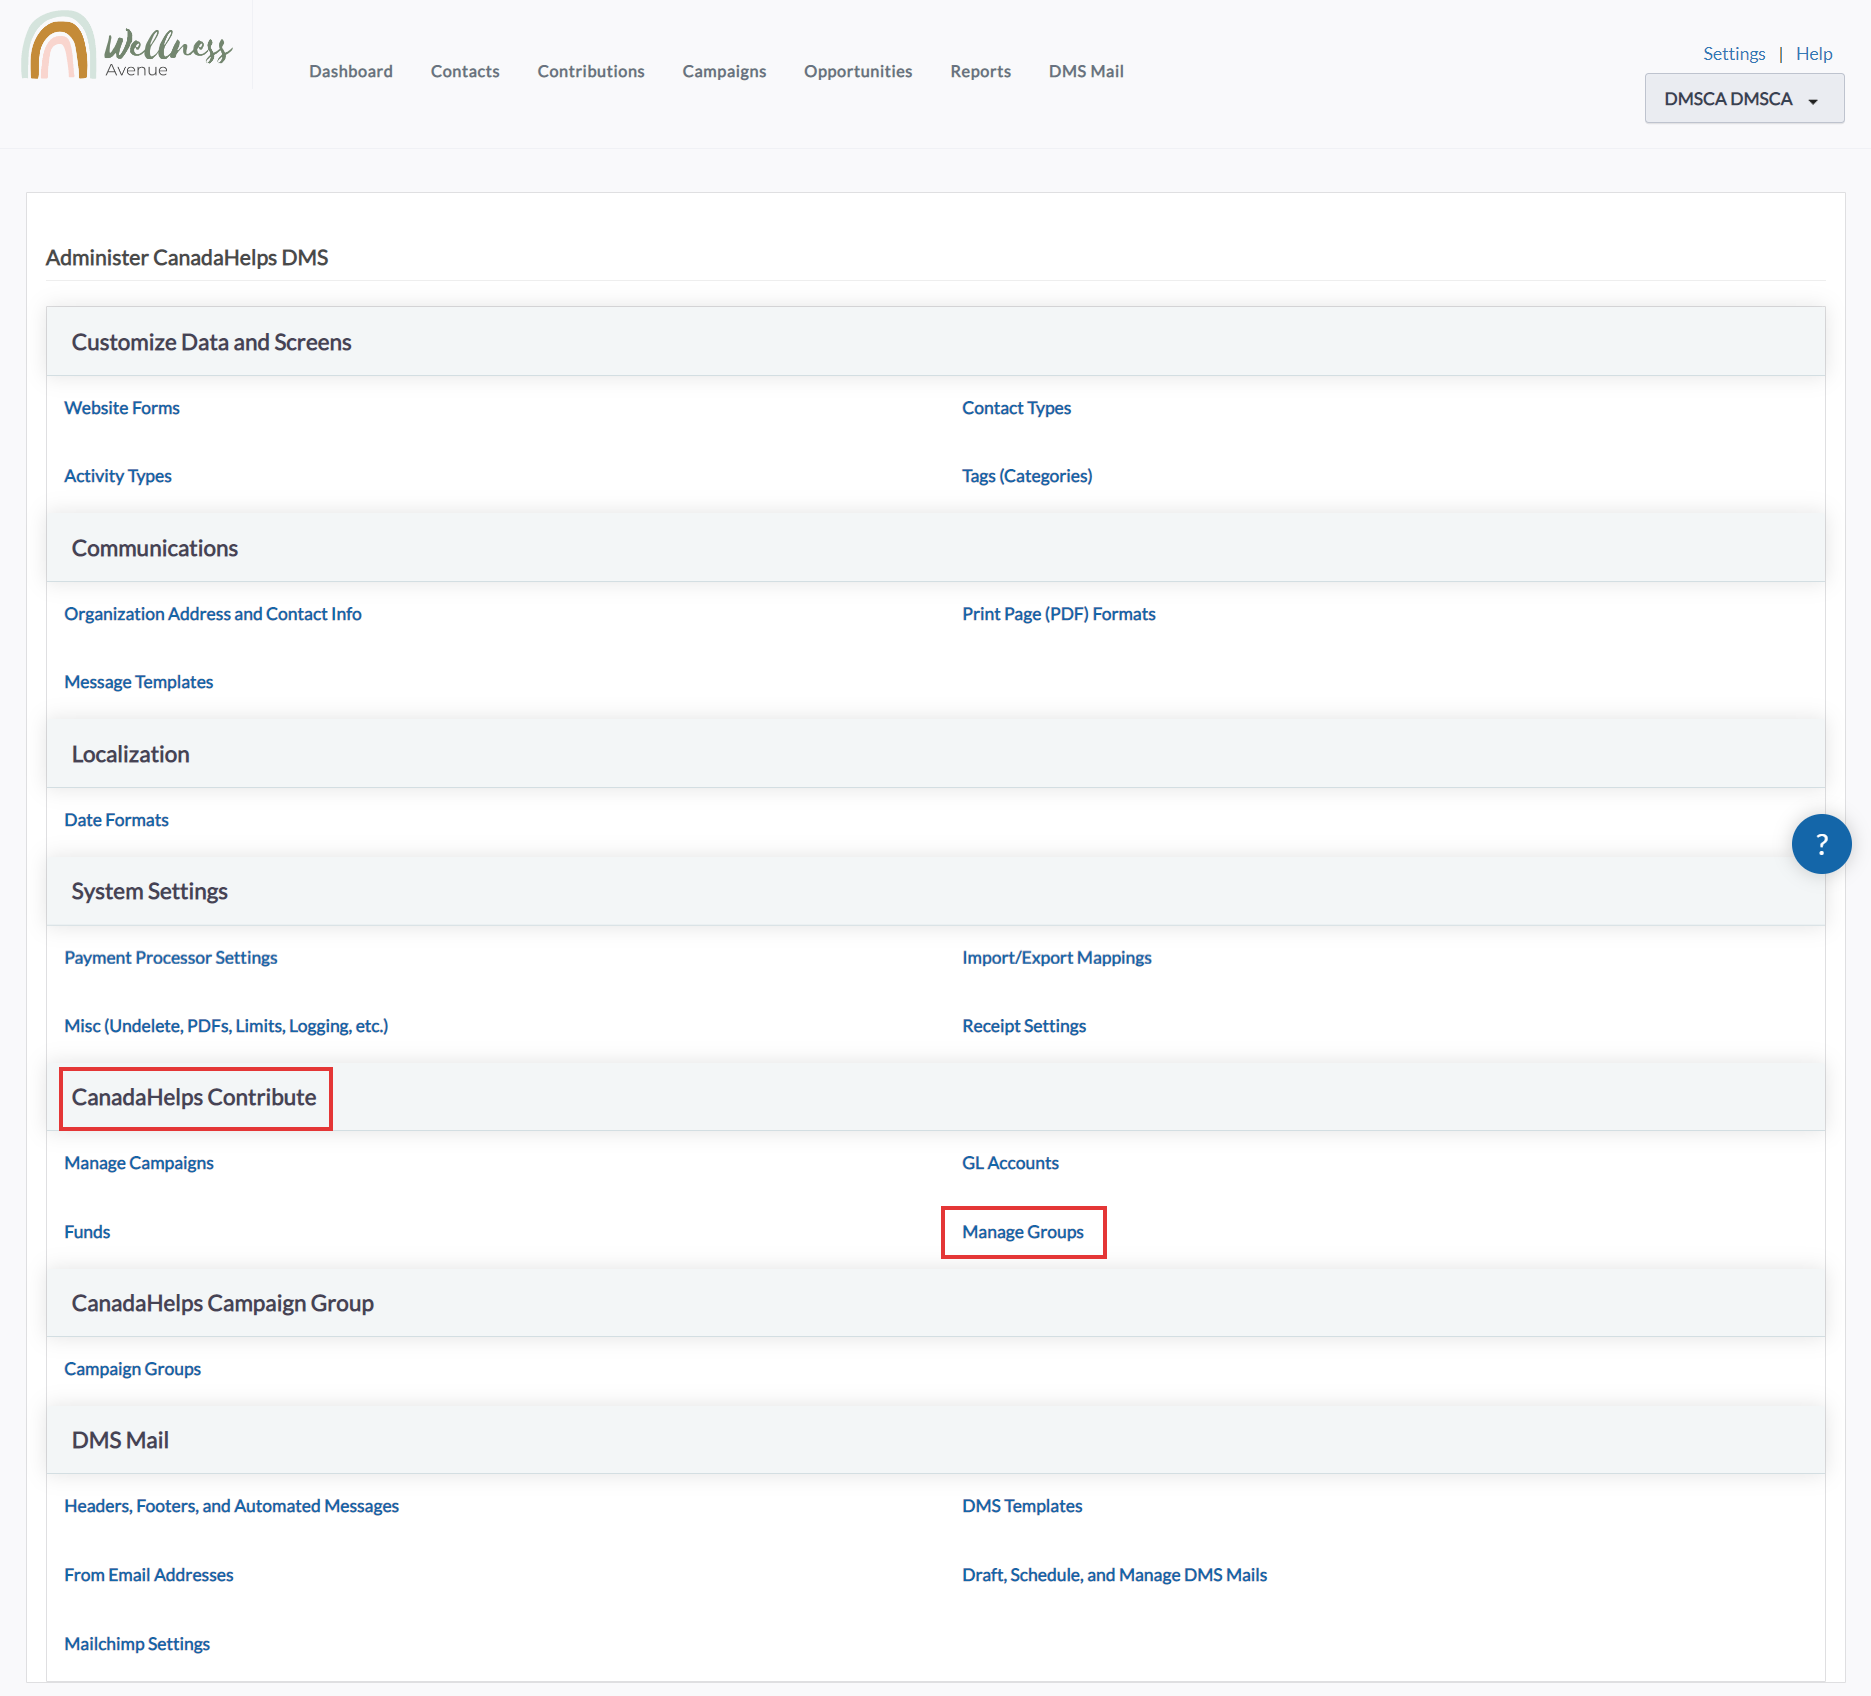
1. Go to the Administrative Settings
2. Under CanadaHelps Contribute, select Manage Groups
 Manage Groups from your Settings
3. On the Manage Groups page, you will be able to see a list of all Groups and various actions:
Note: Smart Groups will be labelled (Smart Group)
 Modify Groups
- Hover your cursor to be able to edit the Group Name.
- Press on the “pencil icon” to edit the Group Description.
- See a list of all Contacts in the Group.
- Change the Group Settings. You will also be able to add or remove a Parent Group associated with the Group.
- Press on "More" to Delete the Group.