Donor Management System
In Kind Receipts in the DMS have the same format as regular Tax Receipts and are fully compliant with the CRA.
Note: You cannot issue Combined Tax Receipts for In-Kind Contributions due to the unique nature of each In-Kind donation.
In Kind Receipts have In Kind only fields that you can set per Contribution, related to appraisals and the property being donated. Only the fields you fill out will display on the Tax Receipt.
 In Kind Donation Fields
Adding a Single Contribution with In Kind Fields
1. Go to the Contributions Tab
2. Select Add Contribution on the top right corner of the screen
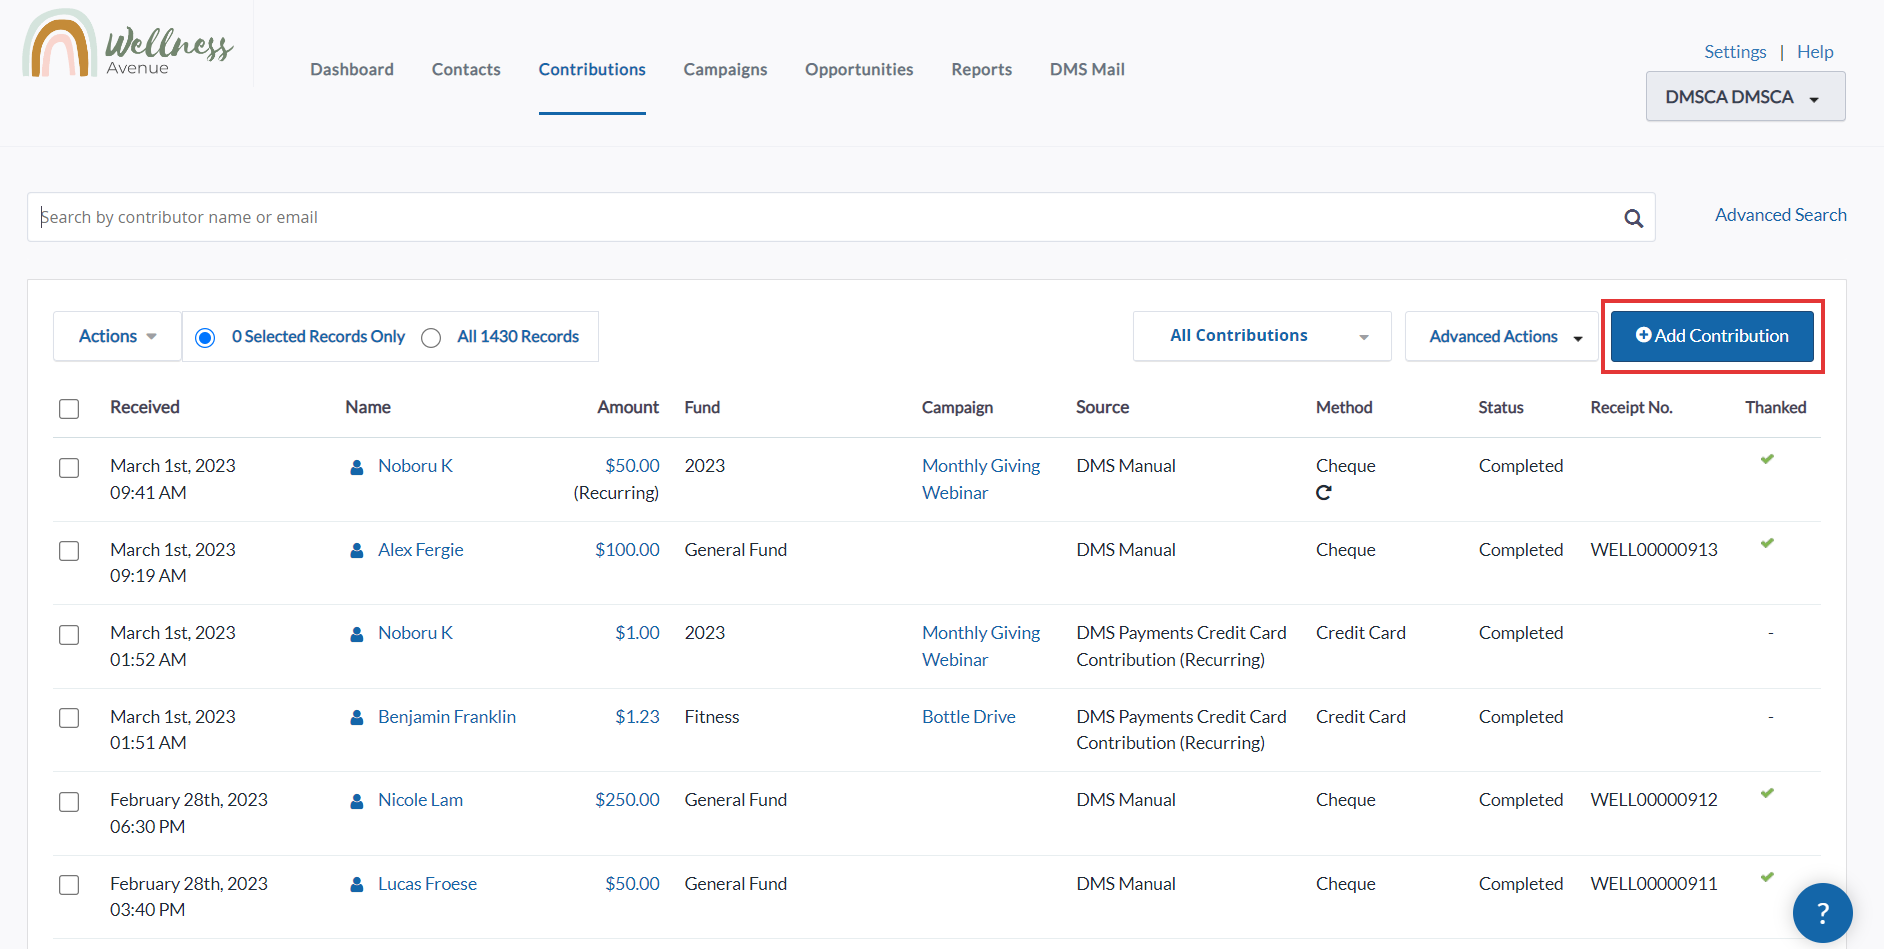 Add Contribution
3. Fill out all mandatory and necessary fields on the New Contribution page:
Main Fields:
- Contributor: the Contact making this donation.
- You can further narrow your search based on specific criteria.
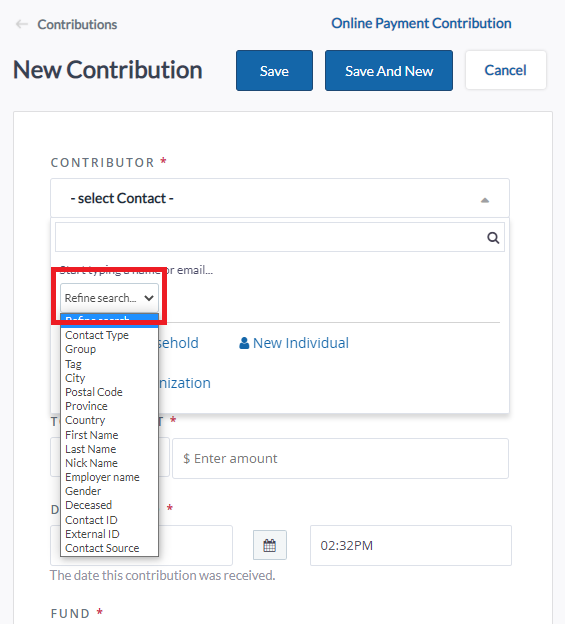 Add Contribution - Refine Search
- Payment Method: the payment method used to make this donation.
- Transaction ID: an additional external ID in addition to the automatic one created in the DMS (e.g. ID from an external payment processor).
- Total Amount: the total monetary amount for this donation.
- Data Received: the date this donation was received.
- Fund: the Fund this donation is going into.
- Campaign: the Campaign associated with this donation.
- Source: which source the donation is coming from (e.g. Historical Data Import). You can also add a new Source by selecting +Add New Source on the right.
- When adding an offline Contribution, the default Source will be DMS Manual.
- Contributions coming from CanadaHelps.org will have a default source of CanadaHelps.
Contribution Details:
- Exclude From Tax Receipting: Select Yes if a Tax Receipt for this Contribution has already been issued externally, or if it is not eligible for Receipting. Otherwise, you can either select No or leave the question blank.
- External Receipt Number: if the Contribution has been receipted externally, add the external receipt number.
- Contribution Note: optional note for the whole Contribution.
- Mark Contribution as Recurring: indicates if the donation is recurring. If it is, you still have to manually process the subsequent Contributions.
Dedication Information:
- In Memory Of: if the donation is in memory of something and/or someone.
- In Honour Of: if the donation is in honour of something and/or someone.
- Name of Honoree: the name of the honoree associated with this dedication.
- Message: optional message associated with the dedication.
Additional Details:
- Advantage Amount: the total monetary amount of the Advantage.
- Advantage Description: optional description for this Advantage (75 character limit).
- Fee Amount: external fee in addition to any CH fees (e.g. a fee from an external payment processor)
- Thank-you Date: the date and time that this donation has been thanked. The Contribution will be marked as Thanked.
4. Select In Kind as the Payment Method. The Fund will be automatically set as In Kind.
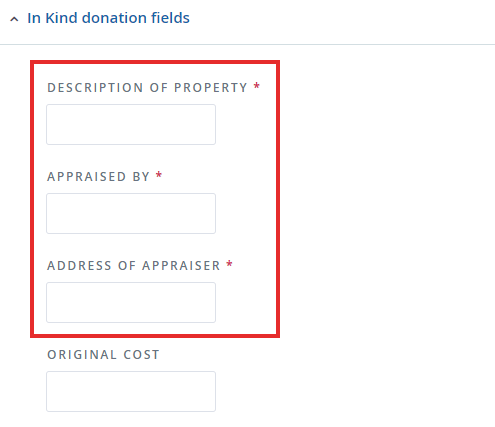
5. A new In Kind donation fields section will show up with the following fields:
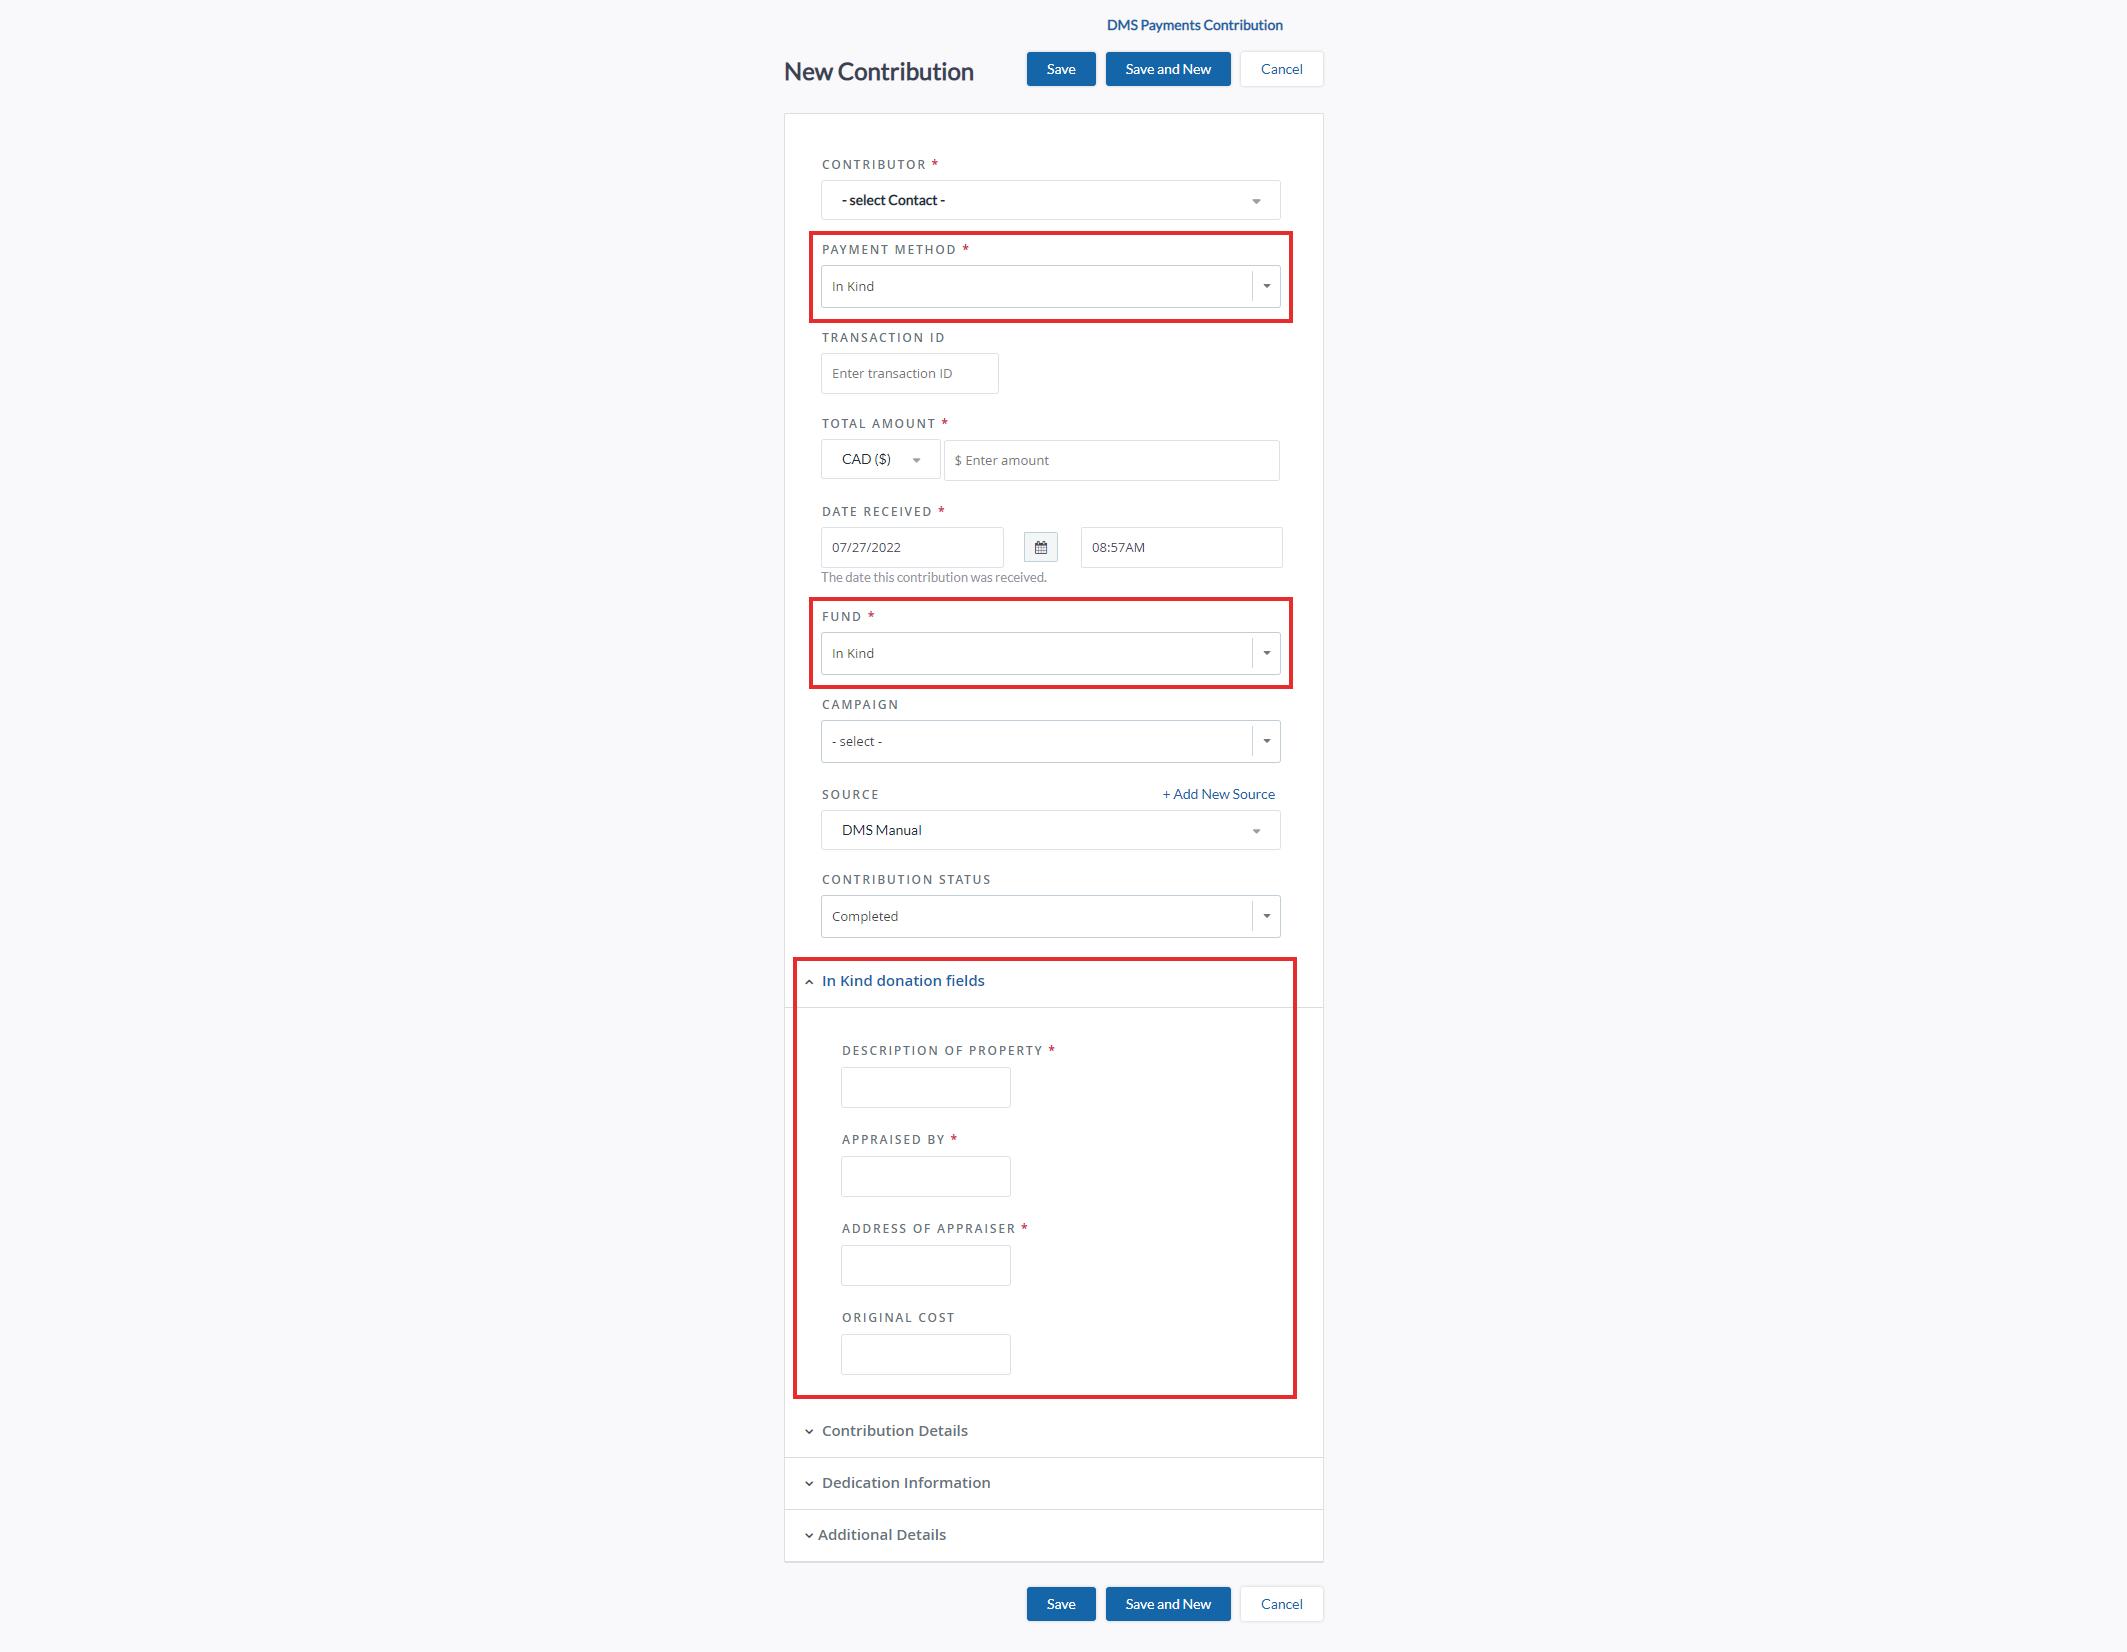 In Kind Donation Fields
- Description of Property: the description of the received Property (75 character limit).
- Appraised By: who appraised this In Kind donation.
- Address of Appraiser: the full address of the Appraiser (55 character limit).
- Original Cost: the original cost of the received Property (55 character limit).
6. After filling out all necessary fields, Select Save to add the new Contribution.
Issuing In Kind Receipts
After adding a Contribution with In Kind fields, you can then issue an In Kind Tax Receipt for it.
Single In Kind Receipts
1. Go to the Contributions Tab
2. Search for the specific in-kind Contribution you wish to issue a Tax Receipt for
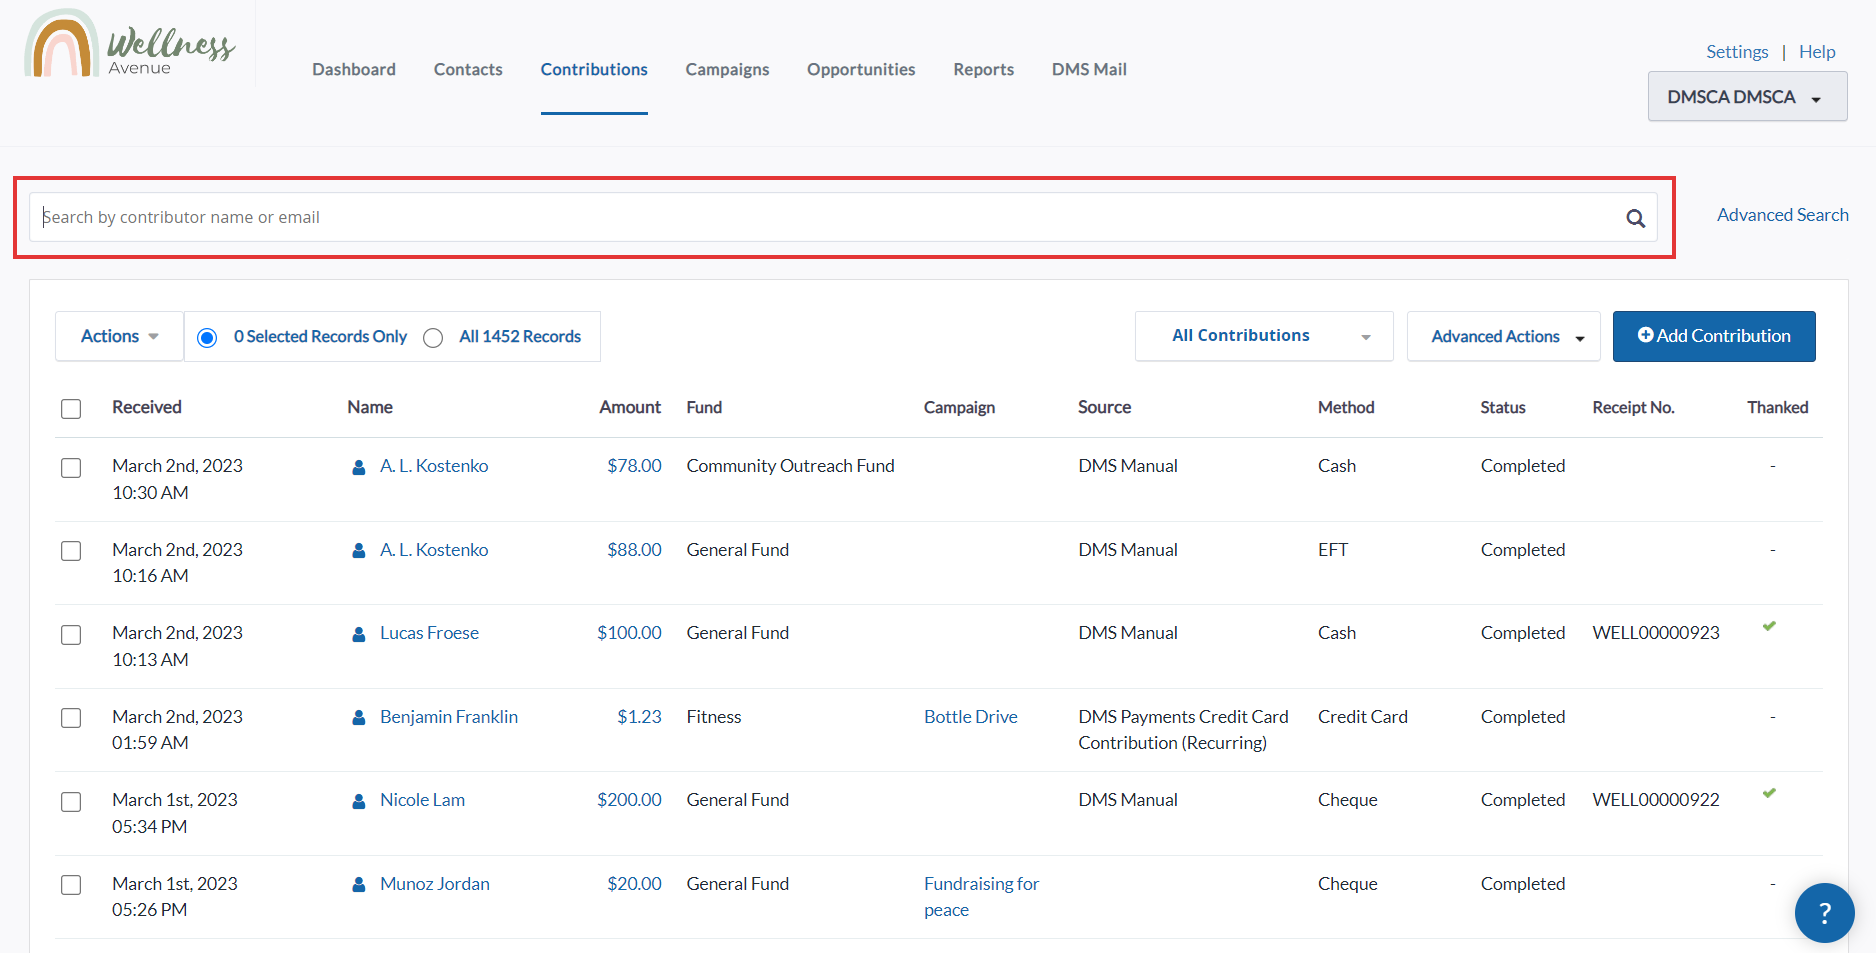 Search for the specific Contribution
3. Select the specific Contribution Amount
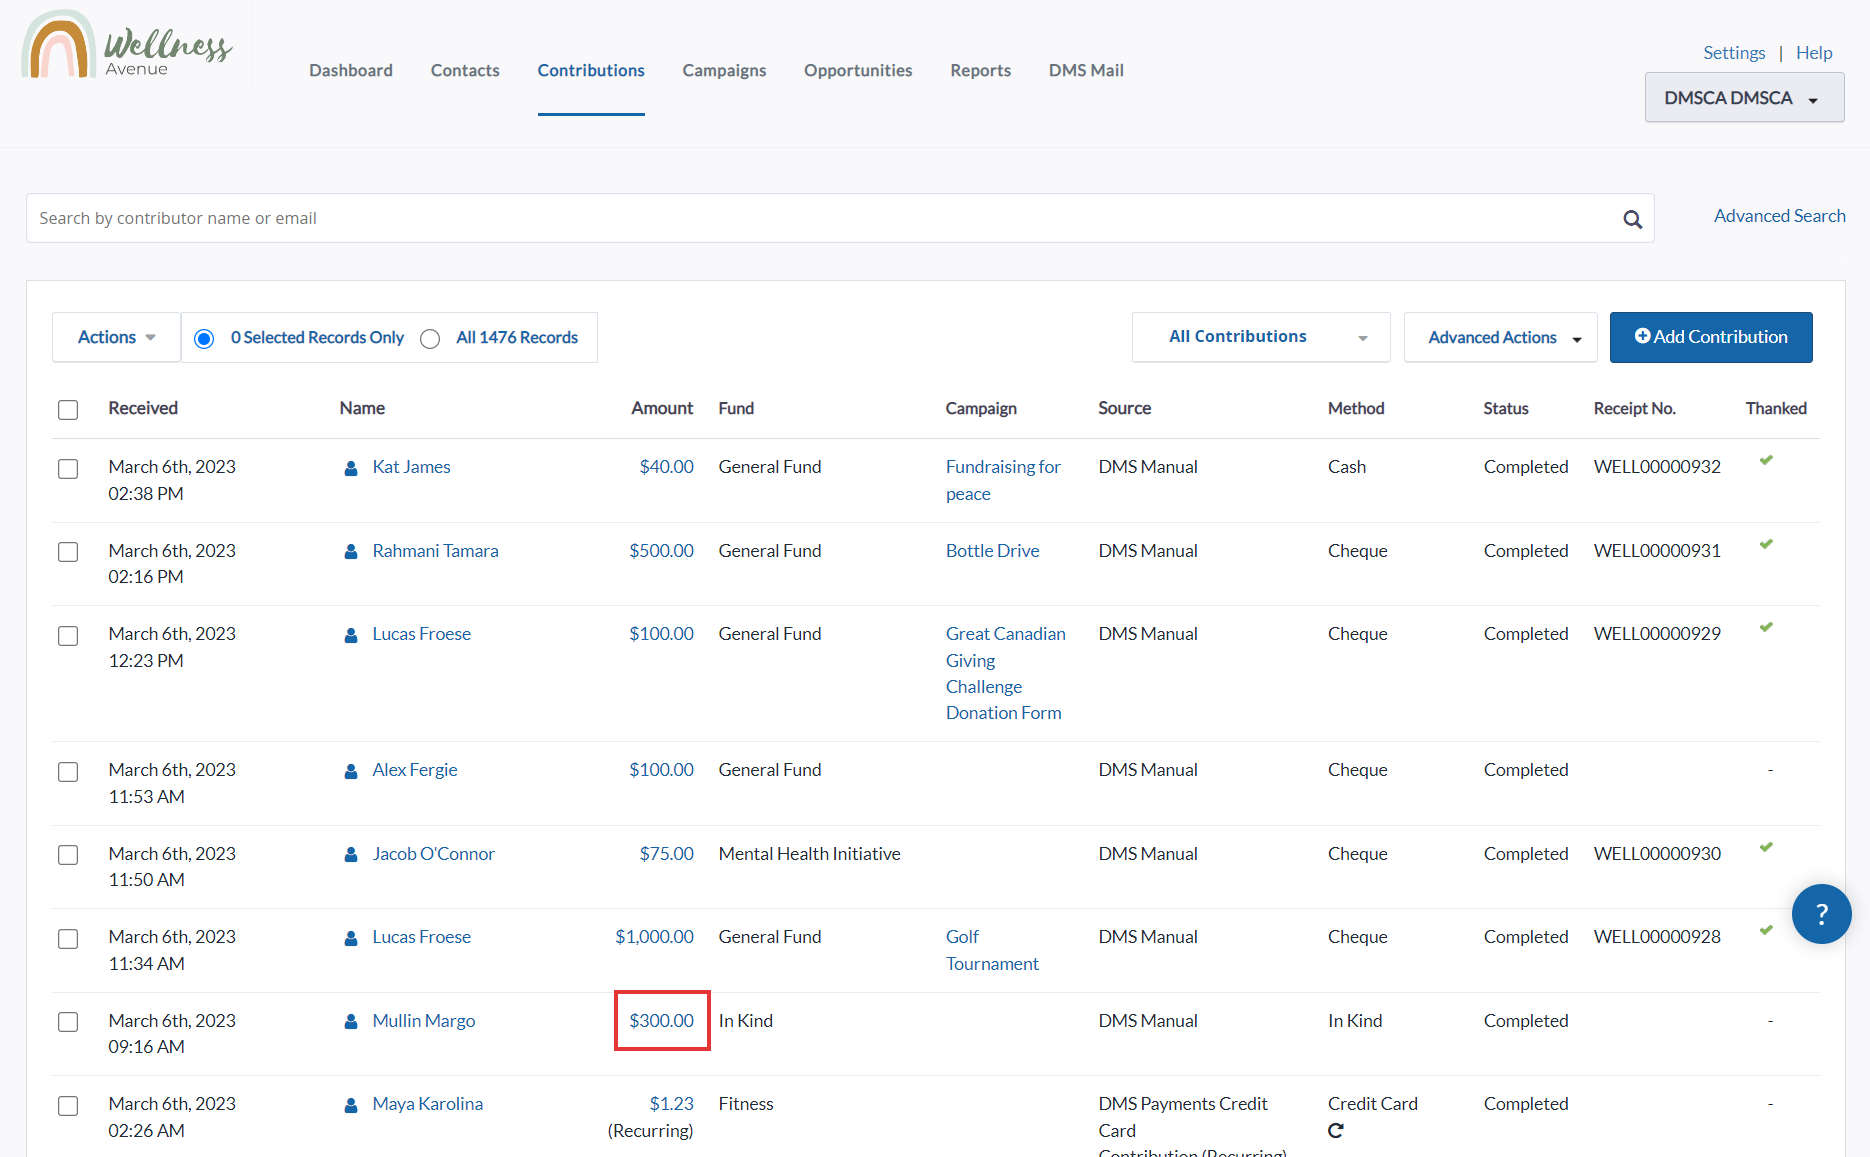 Select Contribution Amount
4. On the next page, select Issue Tax Receipt at the top right
 Issue Tax Receipt
5. Select Preview to see a preview of the Receipt before actually issuing it
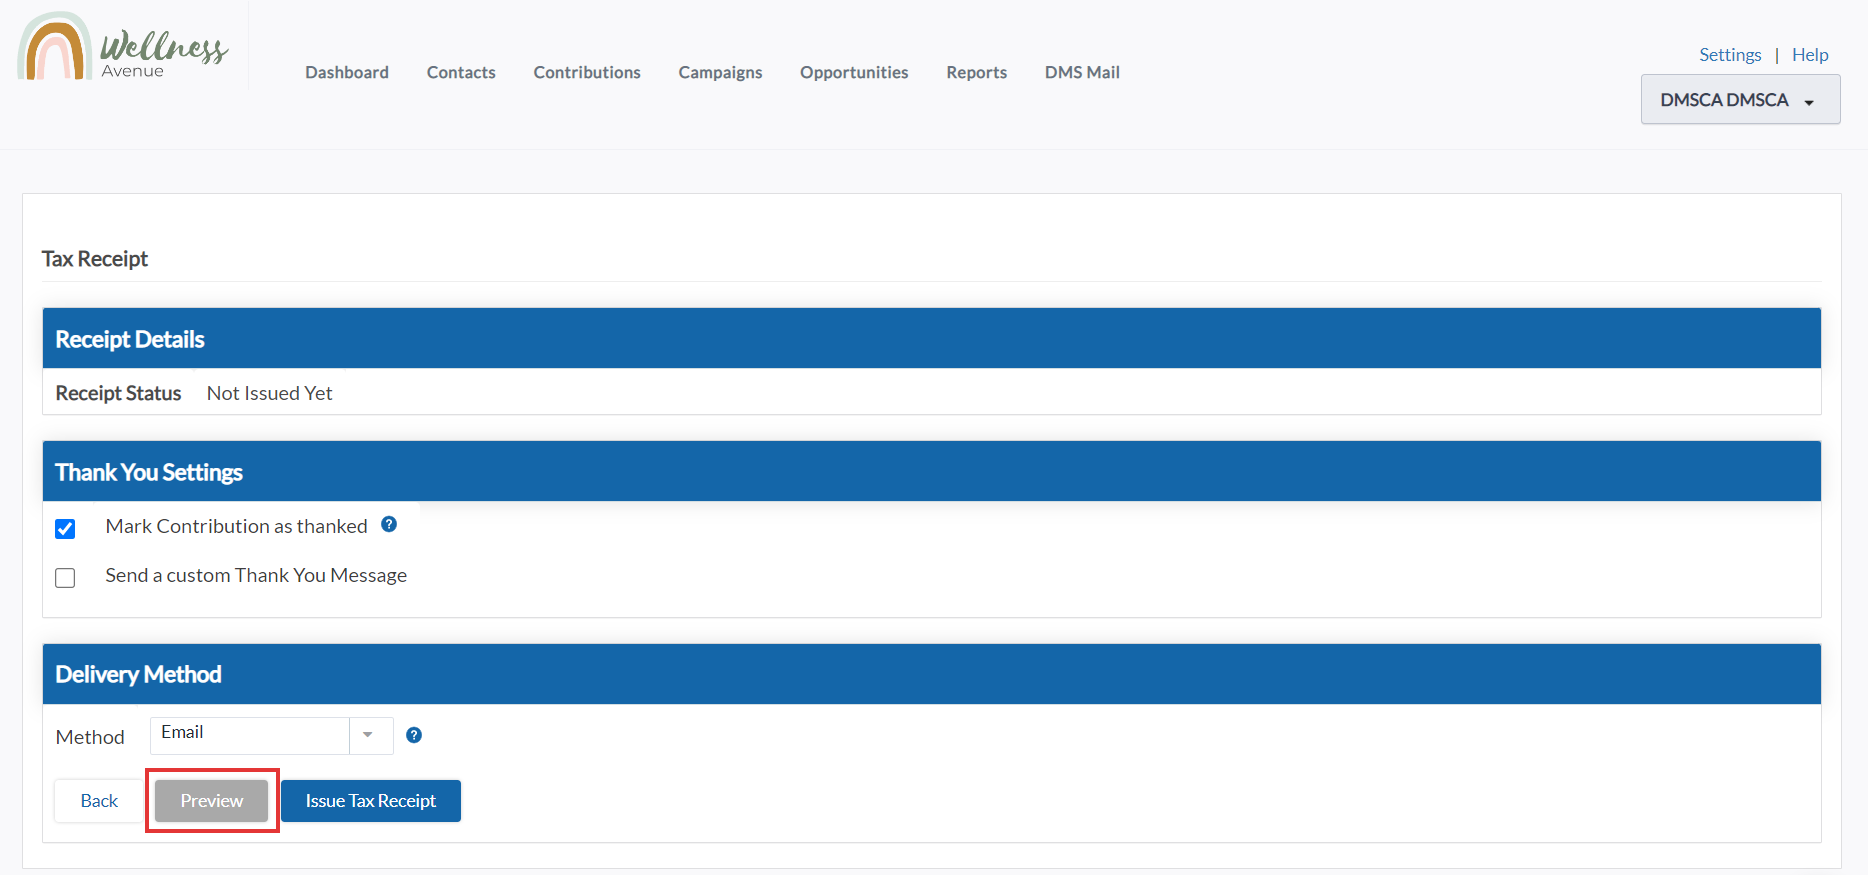 Preview Tax Receipt
6. You can choose how you would like to thank your donors and either:
- Mark Contribution as thanked:
- If you thank your donors separately
- This Contribution will be marked as thanked and receipted in your DMS
 Mark as thanked
- Send a custom Thank You Email Message
- Thank your Contacts via email for their Contribution along with their Tax Receipt using the DMS
- Select custom Thank you Message Templates to be sent with the tax receipt via email
- This Contribution will be marked as thanked and receipted in your DMS
 Send a custom thank-you
- Print: save your Tax Receipt(s) in PDF format to print and send to your Contacts manually, or
- Email: Email the Contact with the optional custom Thank You Message and the attached PDF Tax Receipt and Download to save the receipt as a PDF (via your backend email for receipt communications).
 Choose delivery method
8. Then, select Issue Tax Receipt. The in-kind Tax Receipt will then be downloaded and/or sent to the Contact’s registered email address:

Multiple In Kind Receipts
1. Go to the Contributions Tab
2. Search for a specific Contribution or select either:
- (1) The specific Contributions you wish to issue Tax Receipts for,
- (2) Every listed Contribution on the page, or
- (3) All Contributions in your search criteria
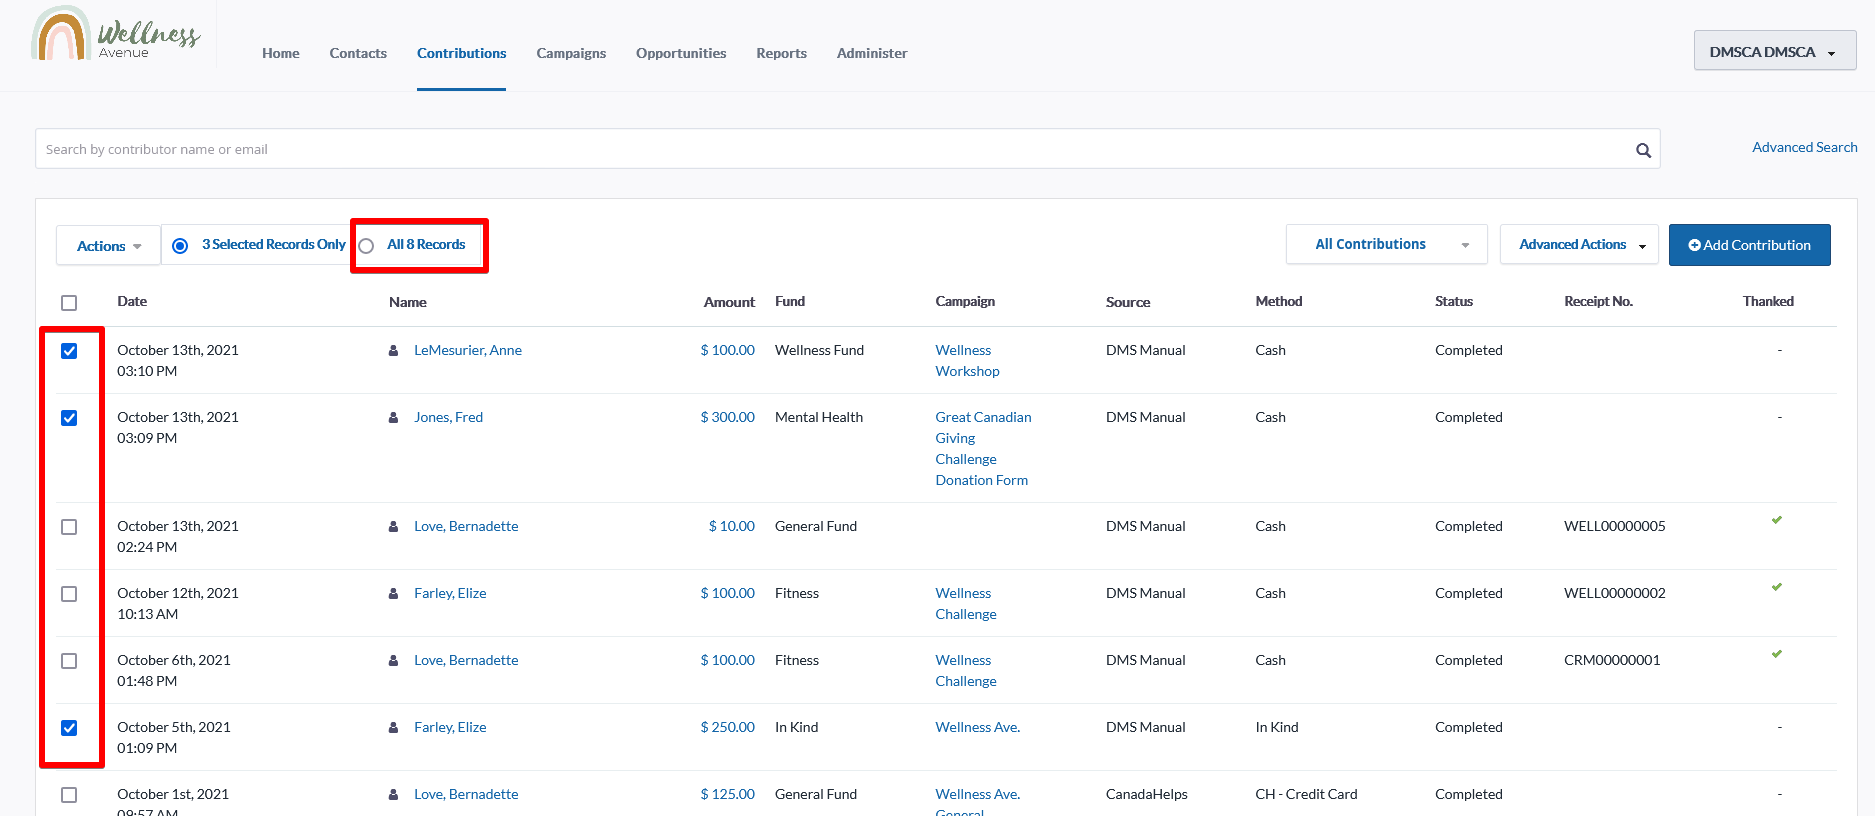 3 Ways to Select Contributions
 3. Select the Actions menu at the upper-left side of the Contributions list
4. Select either
- Issue Tax Receipts (Combined Receipts with Total Contributed), or
- Issue Tax Receipts (Separate Receipt for Each Contribution)
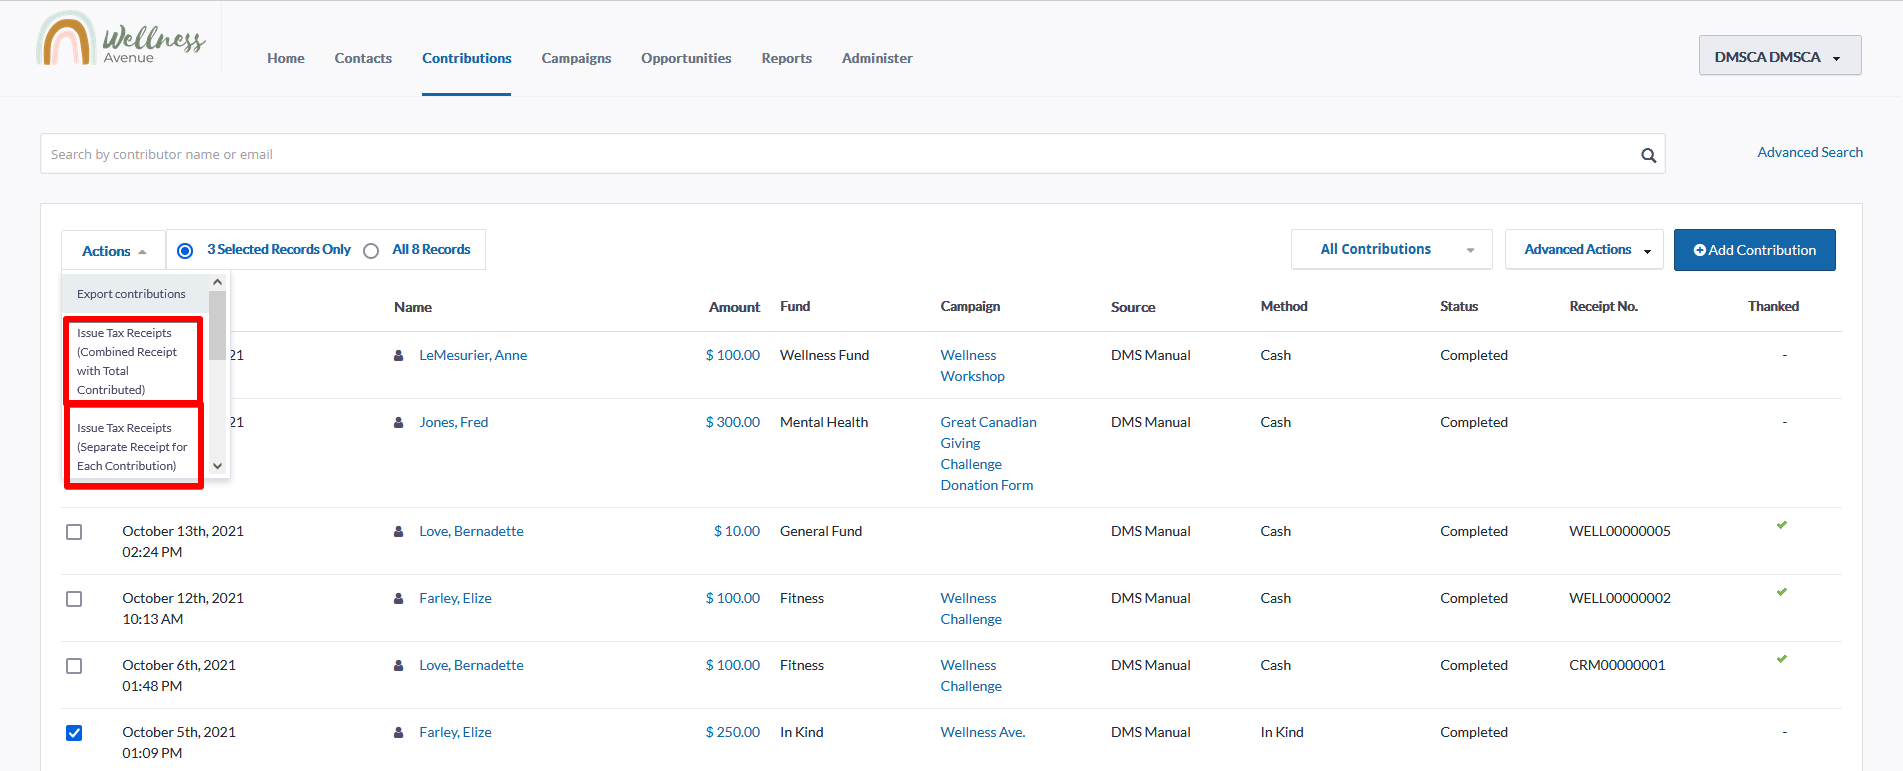 Options to Issue Tax Receipts
5. You will then be directed to the specific Receipting Page (depending on which option you selected)
Issuing Combined Receipts with Total Contributed
1. After selecting your desired Contributions, you will be directed to the Combined Receipt Export Page. You will have the chance to review and select the following:
 Issue Tax Receipt Options
- How many Contributions were selected, how many Contributions are eligible for receipting, and total eligible amount.
- Tax Year: which tax year to issue the Tax Receipt(s) for.
- Thank you Settings: choose how you would like to thank your donors
- Delivery Method: choose to (download and) print or email the Tax Receipt
- Also re-issue duplicates: choose to re-issue Tax Receipts for Contributions that have already been receipted
- Preview: preview how your finalized Tax Receipt(s) will look like.
2. Select Preview to see a preview of the Receipts before issuing them
 Preview Receipts
3. Select your desired Thank You Settings to choose how you would like to thank your donors:
- Mark Contribution as thanked:
- If you thank your donors separately
- These Contributions will be marked as thanked and receipted in your DMS
- Send a custom Thank You Email Message
- Thank your Contacts via email for their Contributions along with their Tax Receipt using the DMS
- Select custom Thank you Message Templates to be sent with the tax receipt via email
- These Contributions will be marked as thanked and receipted in your DMS
 Mark contribution as thanked and send a custom Thank You Email
4. When you’re ready to issue the Tax Receipts, select the Delivery Method to either:
- Print: save your Tax Receipt(s) in PDF format to print and send to your Contacts manually.
- Email: Email the Contact with the optional custom Thank You Message and the attached PDF Tax Receipt and Download to save the receipt as a PDF (via your backend email for receipt communications).
5. Then, select Issue Tax Receipts
 Select Delivery Preference and then Select Issue Tax Receipts
6. The Tax Receipt(s) will then be downloaded or sent to the Contacts’ registered email address.
Issuing Separate Receipts for Each Contribution
1. After selecting your desired Contributions, you will be directed to the Separate Receipt Export Page. You will have the chance to review and select the following:
 Review Receipting Options
- How many Contributions were selected, how many Contributions are eligible for receipting, and total eligible amount.
- Thank you Settings: choose how you would like to thank your donors
- Delivery Method: choose to (download and) print or email the Tax Receipt
- Also re-issue duplicates: choose to re-issue Tax Receipts for Contributions that have already been receipted
- Preview: preview how your finalized Tax Receipt(s) will look like.
2. Select Preview to see a preview of the Receipts before actually issuing them
Note: When previewing multiple Separate Tax Receipts, the Tax Receipt Numbers on each individual receipt will show up as the same. The numbers will be unique once you issue the Separate Tax Receipts.
 Preview Receipts
3. If you has selected contributions that have already been receipted in the DMS and would like to re-issue these receipts, select Also re-issue duplicates.
 Select "Also re-issue duplicates"
4. Select your desired Thank You Settings to choose how you would like to thank your donors:
- Mark Contribution as thanked:
- If you thank your donors separately
- This Contribution will be marked as thanked and receipted in your DMS
 Mark contribution as thanked
- Send a custom Thank You Email Message
- Thank your Contacts via email for their Contribution along with their Tax Receipt using the DMS
- Select custom Thank you Message Templates to be sent with the tax receipt via email
- This Contribution will be marked as thanked and receipted in your DMS
 Send a custom Thank You Email Message
5. When you’re ready to issue the Tax Receipts, select the Delivery Method to either:
- Print: save your Tax Receipt(s) in PDF format to print and send to your Contacts manually.
- Email: Email the Contact with the optional custom Thank You Message and the attached PDF Tax Receipt and Download to save the receipt as a PDF (via your backend email for receipt communications).
5. Then, select Issue Tax Receipts
 Delivery Preferences and Issue Tax Receipts
6. The Tax Receipt(s) will then be downloaded or sent to the Contacts’ registered email address.