Donor Management System
Thanking your donors for each donation to your cause, however large or small the gift, is important for the long-term growth of your organization. To build trust and loyalty, and facilitate continued donations and support, the most successful charities acknowledge their donors and generously communicate their gratitude and appreciation for them. This could be in the form of newsletters, announcements and other forms of communications to share why and how each donor’s gift makes a difference. Charities aiming to provide a more personal touch send out individualized thank you emails and letters.
🎥 Prefer to watch a guided walk-through of thanking your donors through the DMS? Check out our Communicating with your Donors Webinar!
With CanadaHelps’ Donor Management System, charities can create templates, send thank you emails individually or in bulk via email or by printing letters, and verify that a thank you message has been sent to the donor. Please see the chart below to determine which process best suits your needs.
I want to...
| Create a new Custom thank you message template. | Send thank you messages with tax receipts. | Send thank you messages separately in bulk. | Send thank you messages separately. | Confirm that a thank you has already been sent. | ||||||
| When should I use this? | If you don’t have an existing template, we recommend you create one to test and preview before you send a thank you message to one or more donors. | When you want to combine a tax receipt and a thank you message in a convenient email. | When you want to send thank you emails in bulk. | For contributions that are not eligible for tax receipting, when you want to send a thank you after providing a physical tax receipt, or generating a PDF thank you letter for printing and mailing. | To ensure you’ve sent a thank you message or to help prevent you from sending duplicate thank you messages. | |||||
| How do I do this? | Follow the steps in the Adding & Managing an Email & Letter Template article for the full instructions. | Follow the steps in the Issuing Tax Receipts article for the full instruction. | Follow the steps in the Thank Donors in Bulk Based on Dedication article for the full instructions. | Follow the steps in the Thanking Your Donor section below and in the Non-Charitable Receipting resource. | Follow the steps in the Confirming That a Thank You Has Been Sent section below. |
Thanking your Donors
Sending thank you messages is a great way for charities to connect with their donors at an intimate level. Whether it’s a touching story about how a donor’s gift directly shapes the lives of others or how their gift helped invigorate ecosystems, thank you emails and letters make your donors feel great about giving to your charity and inspire them to give again.
To send a separate thank you message, follow the steps below:
1. Go to the Contributions Tab
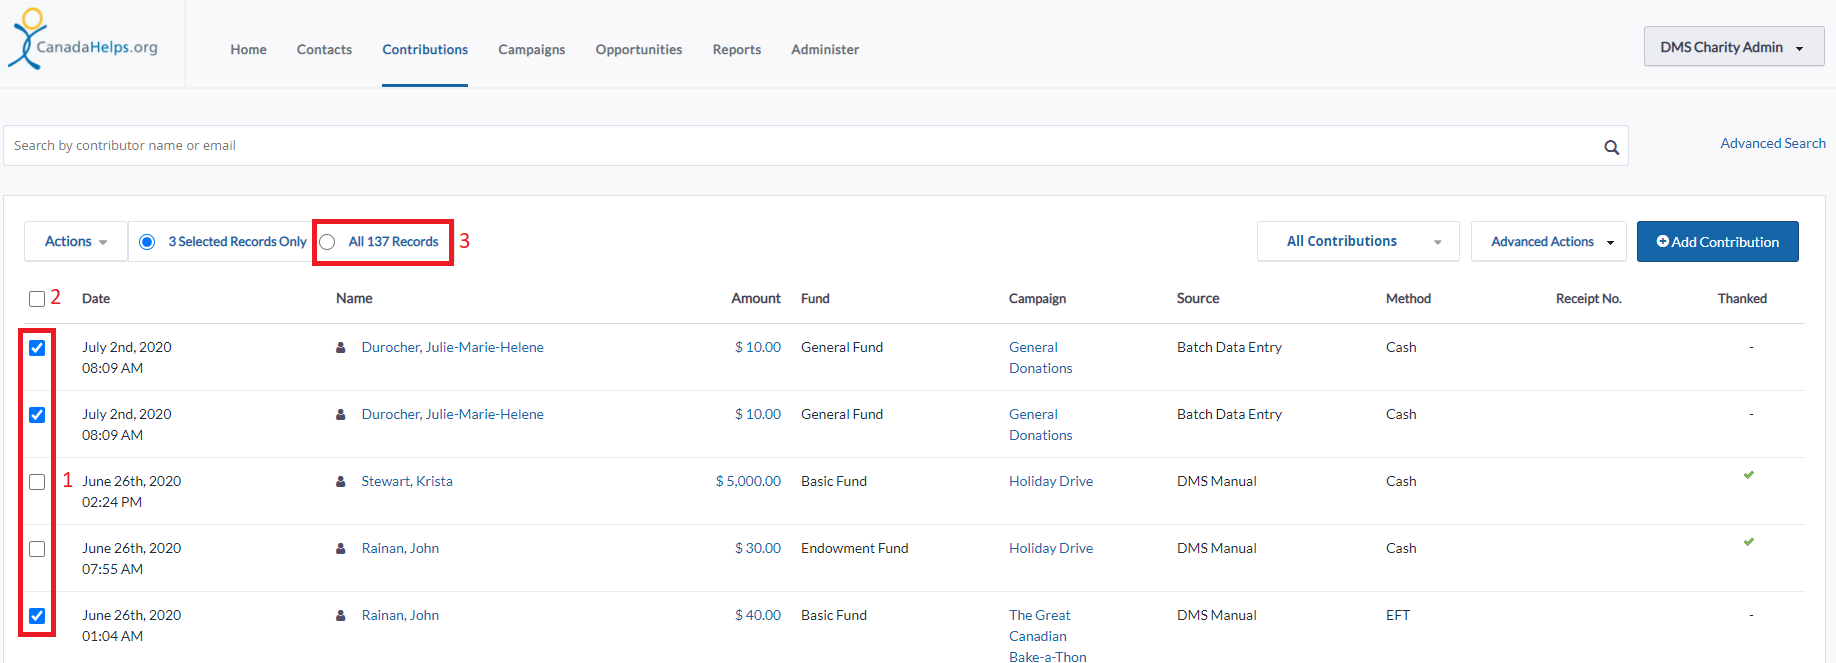
2. Search for a specific Contribution or select either:
- (1) The specific Contributions associated with the Contacts you wish to thank,
- (2) Every listed Contribution on the page, or
- (3) All Contributions in your search criteria
 Search for your desired Contacts
3. Select the Actions menu at the upper-left side of the Contributions list
4. Scroll down the Actions menu and select Send Thank You
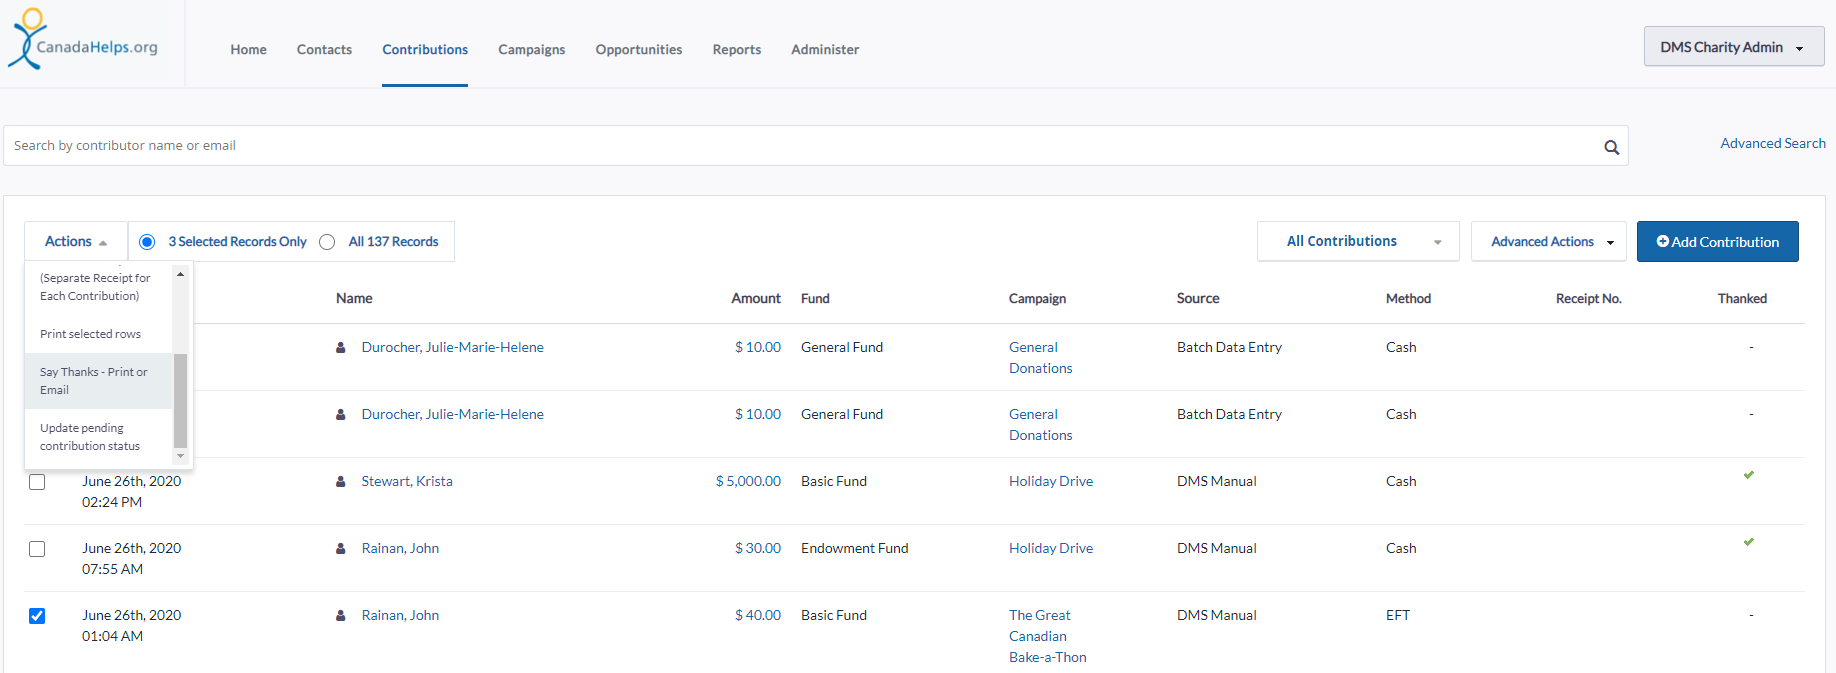 Select Actions > Say Thanks - Print or Email
5. On the next page, you will see the following information:
 Thanking Your Donor Page
Thank-you Letter Options:
- Update thank-you dates for these contributions: updates when the Contact was thanked for the associated Contribution as the date of when you make this Thank-you Letter.
- Print and email options: select the way you want to thank your Contacts.
Email Options:
- From Email Address: which email address is used to send this Thank-you Letter. You can also add additional From Email names.
- Use Template: select an already created Template or create a new one by selecting Save As New Template at the bottom of the page.
- Email/Activity Subject: the subject of the email and the Activity associated with the Contacts after making the Thank-you Letter. Please note that Merge Fields are not available within the Email Message subject at this time, when Thanking Your Donor.
Page Format: Default PDF format:
- Format the PDF dimensions for printing and/or download.
Document Body:
- Compose your email using this standard formatting tool that uses rich-text (e.g. bold, italics, etc.).
- Merge Fields: formerly known as DMS Tokens, they can be used to automatically include information from a Contact in emails (e.g. “Dear {Contact First Name})
Saving Options:
- Save As New Template: save the created or updated contents of this Thank-You Letter as a new Template.
- Document Type: At this moment, you can only download or preview your letter as a Portable Document Format (.pdf)
6. Fill out all mandatory fields and compose your Thank-you Letter.
7. You can use an existing Template or save the contents of your newly composed email/letter by selecting Save As New Template
8. Select Update thank-you dates for these contributions at the top left of the page if you want to update the date the associated Contacts were Thanked.
9. After all the necessary information is added, select Make Thank-you Letters at the bottom of the page to print your letters and/or send emails to the associated Contacts.
Confirming a Thank You Has Been Sent
Avoid confusing your donors by accidentally sending duplicate thank you messages. With the DMS, there are two ways you can verify that a thank you message has been sent to the donor.
To confirm that you’ve already sent a Thank You or marked a Contribution as Thanked, you can check the:
If you wish to apply a check mark in the "Thanked" column of the Contribution tab, without actually generating a dedicated Thank You Email or Letter, you can override this in the Receipting portal by selecting Mark Contribution as thanked.
Learn more about Thanking your donors at the same time as issuing Receipts here.
Confirming a Thank You Has Been Sent Via the Contribution Tab
1. Go to the Contributions Tab.
2. Select Advanced Search on the top right side of the page.
 Advanced Search for Contributions
3. Under Edit Search Criteria, locate the subheading THANK YOU SENT.
 Select your search criteria under THANK YOU SENT
- From the THANK YOU SENT dropdown, select from one of the following:
- Click Yes to only display contributions where a thank you message has been sent;
- Click No to only display contributions where a thank you message has not been sent; or
- If you’d like to change your Yes or No selection and revert to the Any selection, click the x beside Yes or No.
- Scroll down and click Search.
- In the search results, located the Thanked column on the right side of the table.
- Under the thanked column will be a ✔️ or a blank space.
- A ✔️ indicates that a Thank You message has been sent.
- An empty space indicates that a thank you message has not been sent.