Donor Management System
Whenever you send an email through the DMS, you will be able to see and answer replies to these emails directly in the system.
The following guide will only apply if your organization's DMS is configured to receive email replies within the system.
Considerations
- If your DMS Email receives a reply from an email address that is not associated with one of your Contacts, the DMS will automatically add a new Contact for that new email address.
- Email Replies received from your Contacts and any answers to them through the DMS will not be combined onto a single email thread. Each email will be categorized as one separate Activity.
- New Email Replies will refresh within your Home Page hourly.
- Please be sure to have requested a DMS From Email and that you have received confirmation of set-up from your Onboarding Expert.
Which Emails can receive Replies in the DMS?
Replies to the following emails sent through the DMS will be visible in the system:
What happens when I receive a New Email Reply?
Upon signing into your DMS, you will receive a pop-up notification indicating new inbound emails.
Select View to access the new emails, or select Dismiss to dismiss the notification.
 New email reply
Identifying & Answering Email Replies
From the Dashboard
1. Visit your main Dashboard
2. You will then see the New Email Replies Dashlet on your Home Dashboard with all of your unread email replies
 New Email Replies Dashlet
3. To view an Email Reply, select Inbound Email to the right of your desired Email
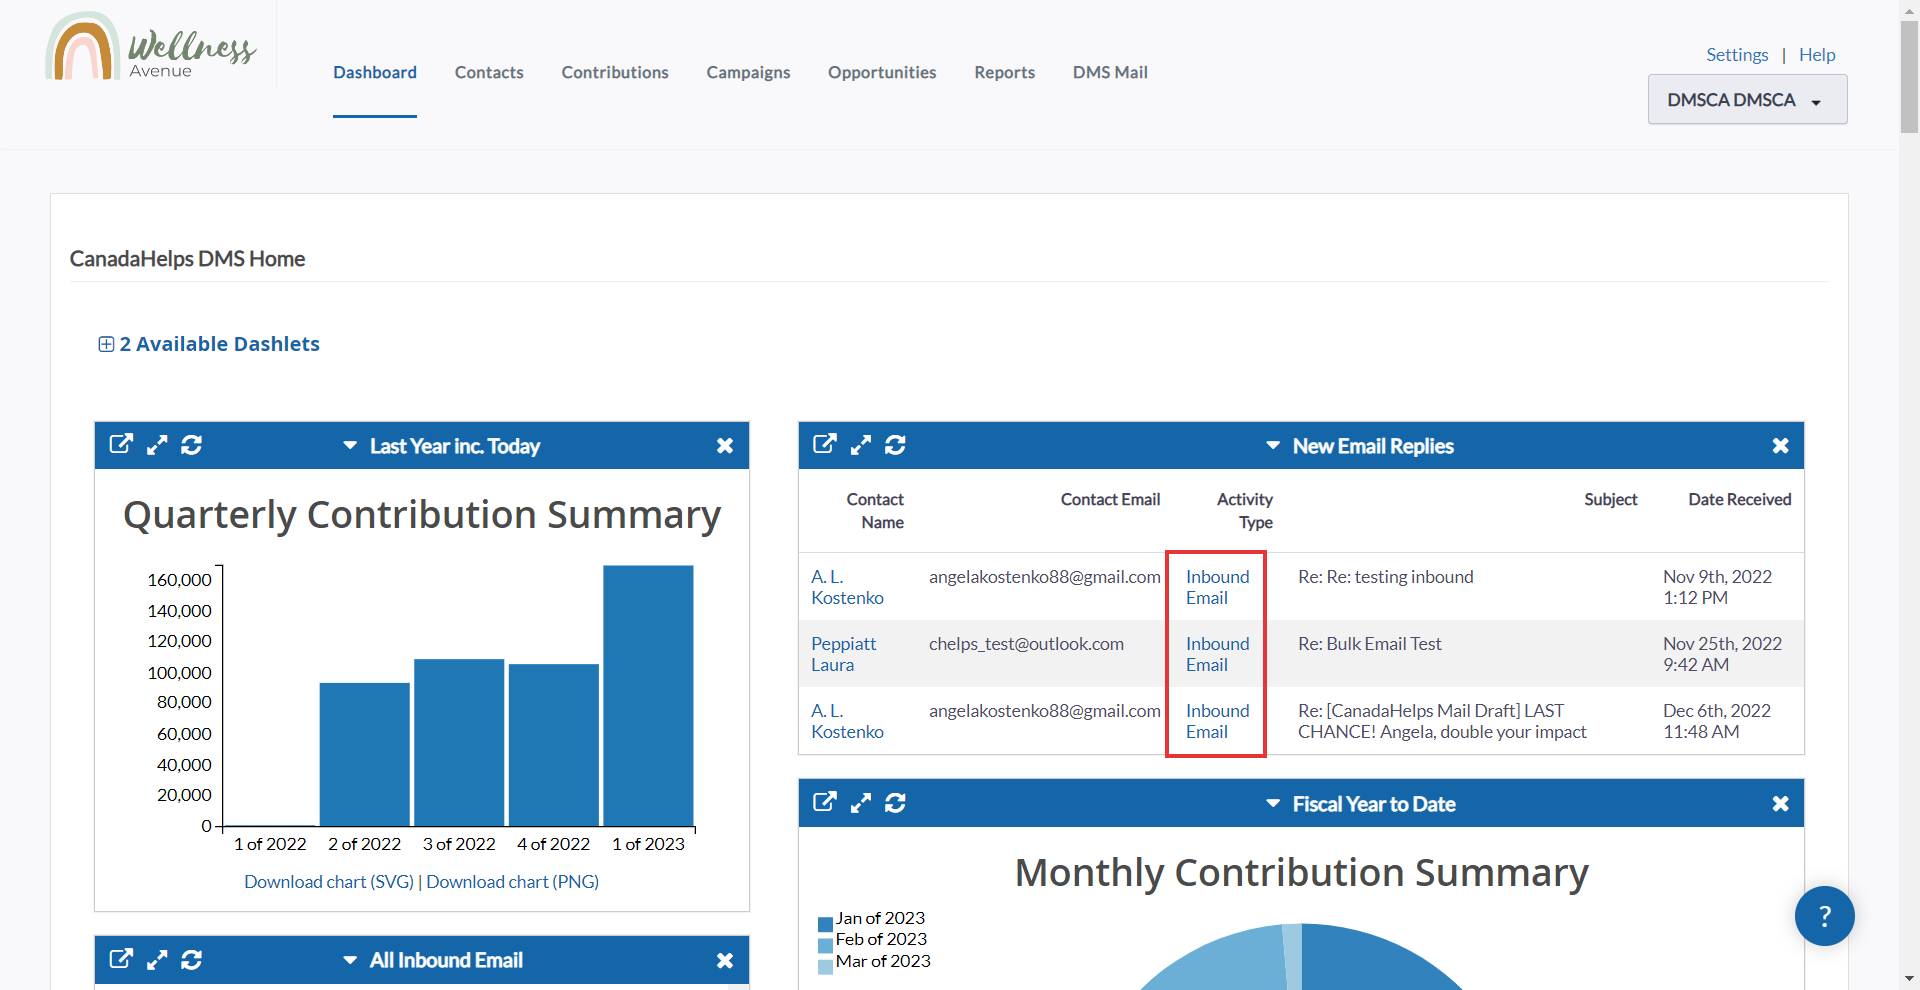 Select Inbound Email for your desired email reply
4. Next, you can read the contents of that email. When ready, select Reply at the bottom right.
 Select Reply
5. On the next page, craft your email. You can use Templates and Merge Fields.
6. Then, select Send Email on the bottom right. Your Contact will receive the email and it will create an Activity related to it on their Contact Profile.
 Craft your message and then select Send Email
From the Reports Tab
1. Visit your Reports Tab
2. Select Contact Reports
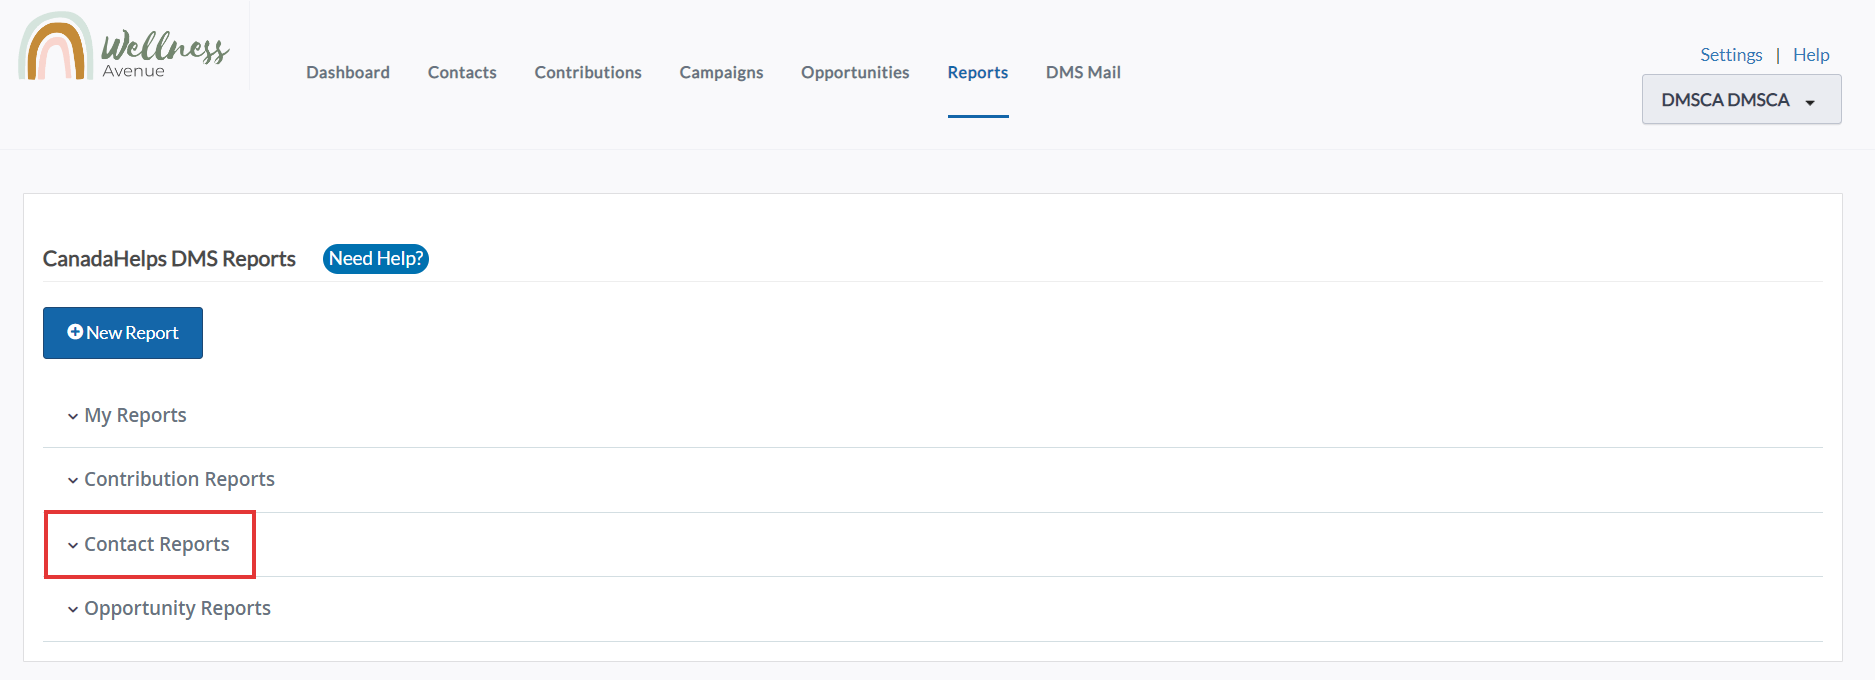 Under the Reports Tab, select Contact Reports
3. Select the New Email Replies Report
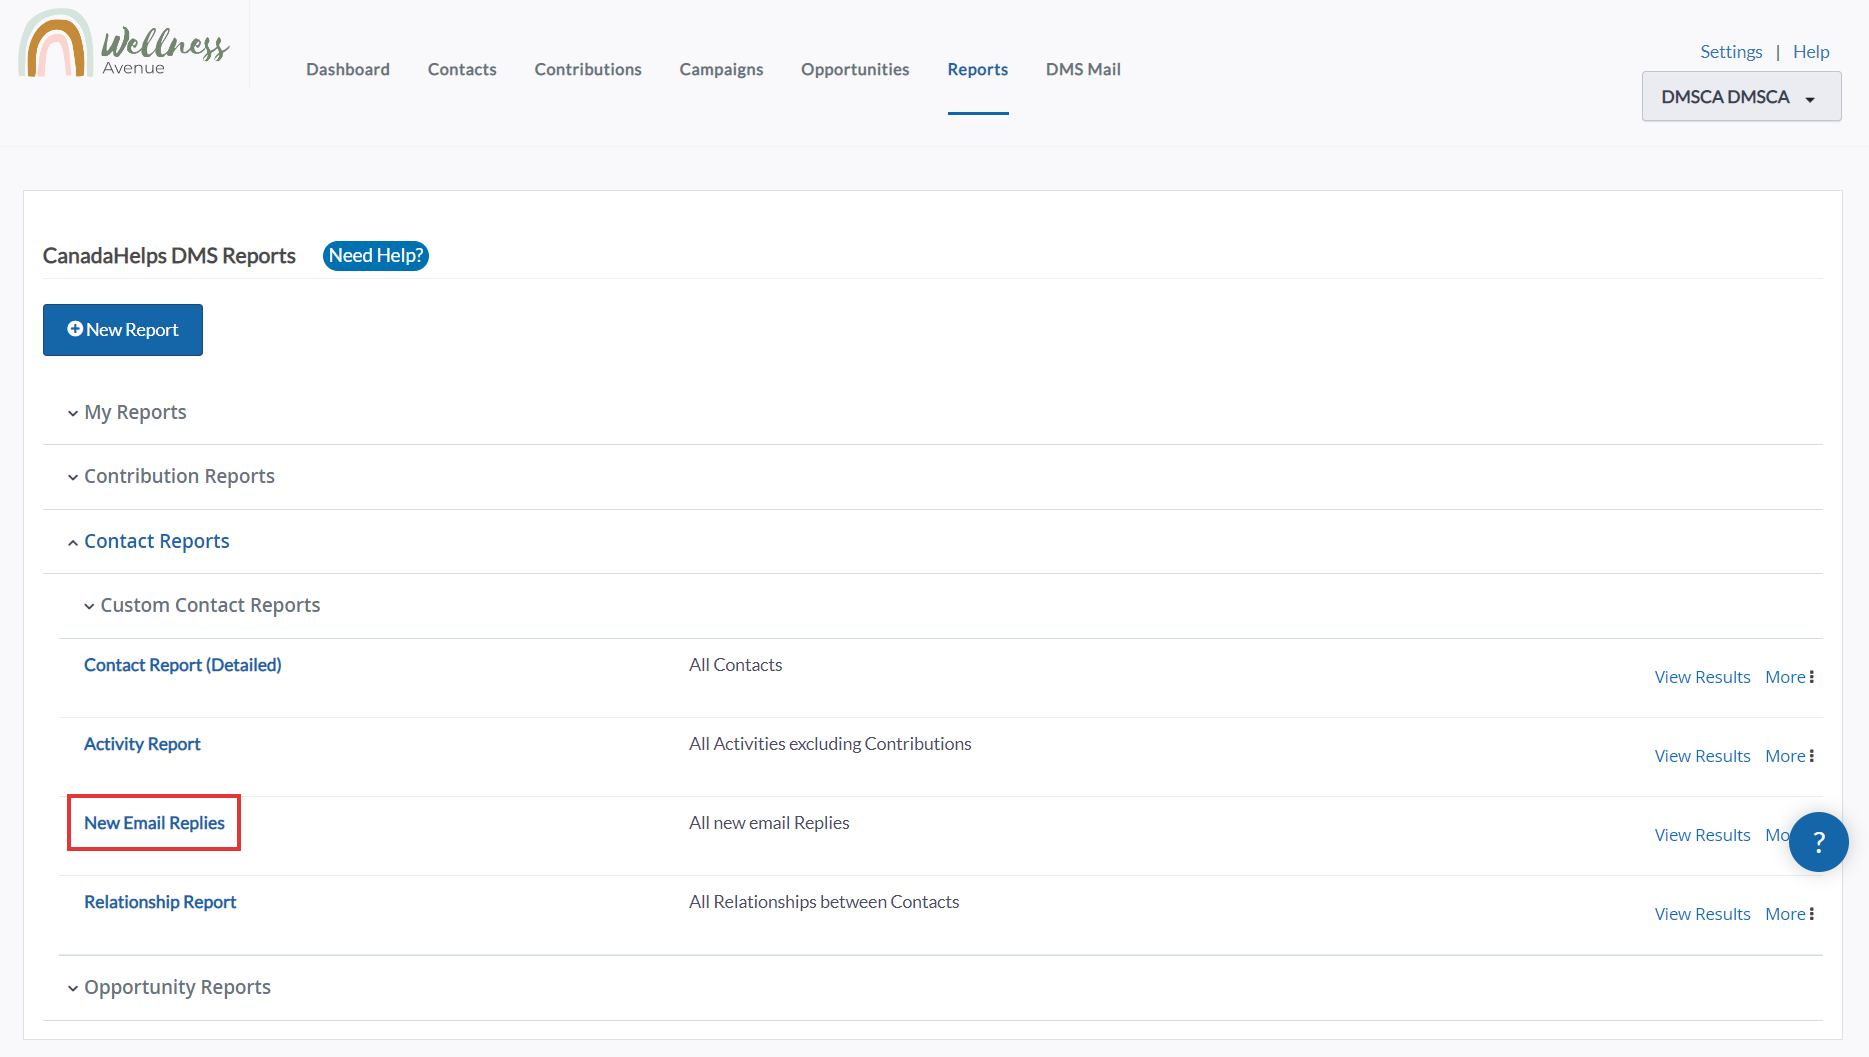 Select New Email Replies
4. On the next page, you can customize your Report with Columns and Filters
5. Once you’re satisfied, select Refresh Results
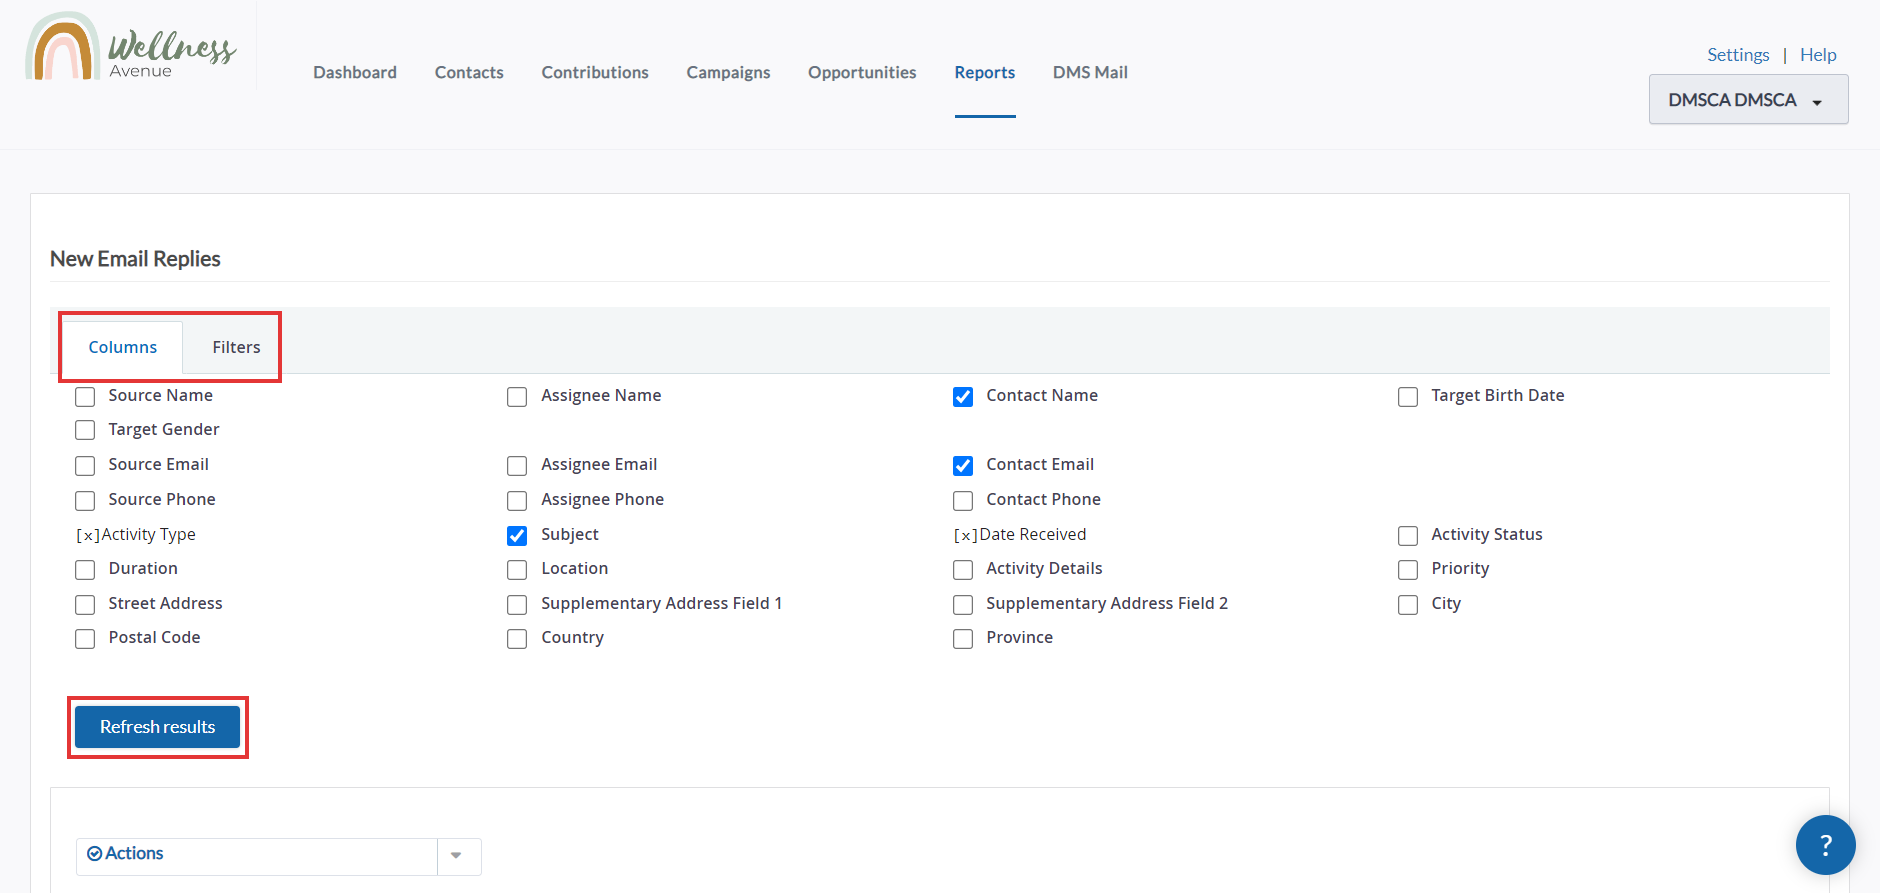 Customize your Report if necessary and then select Refresh Results
6. To view an Email Reply, select Inbound Email to the right of your desired Email
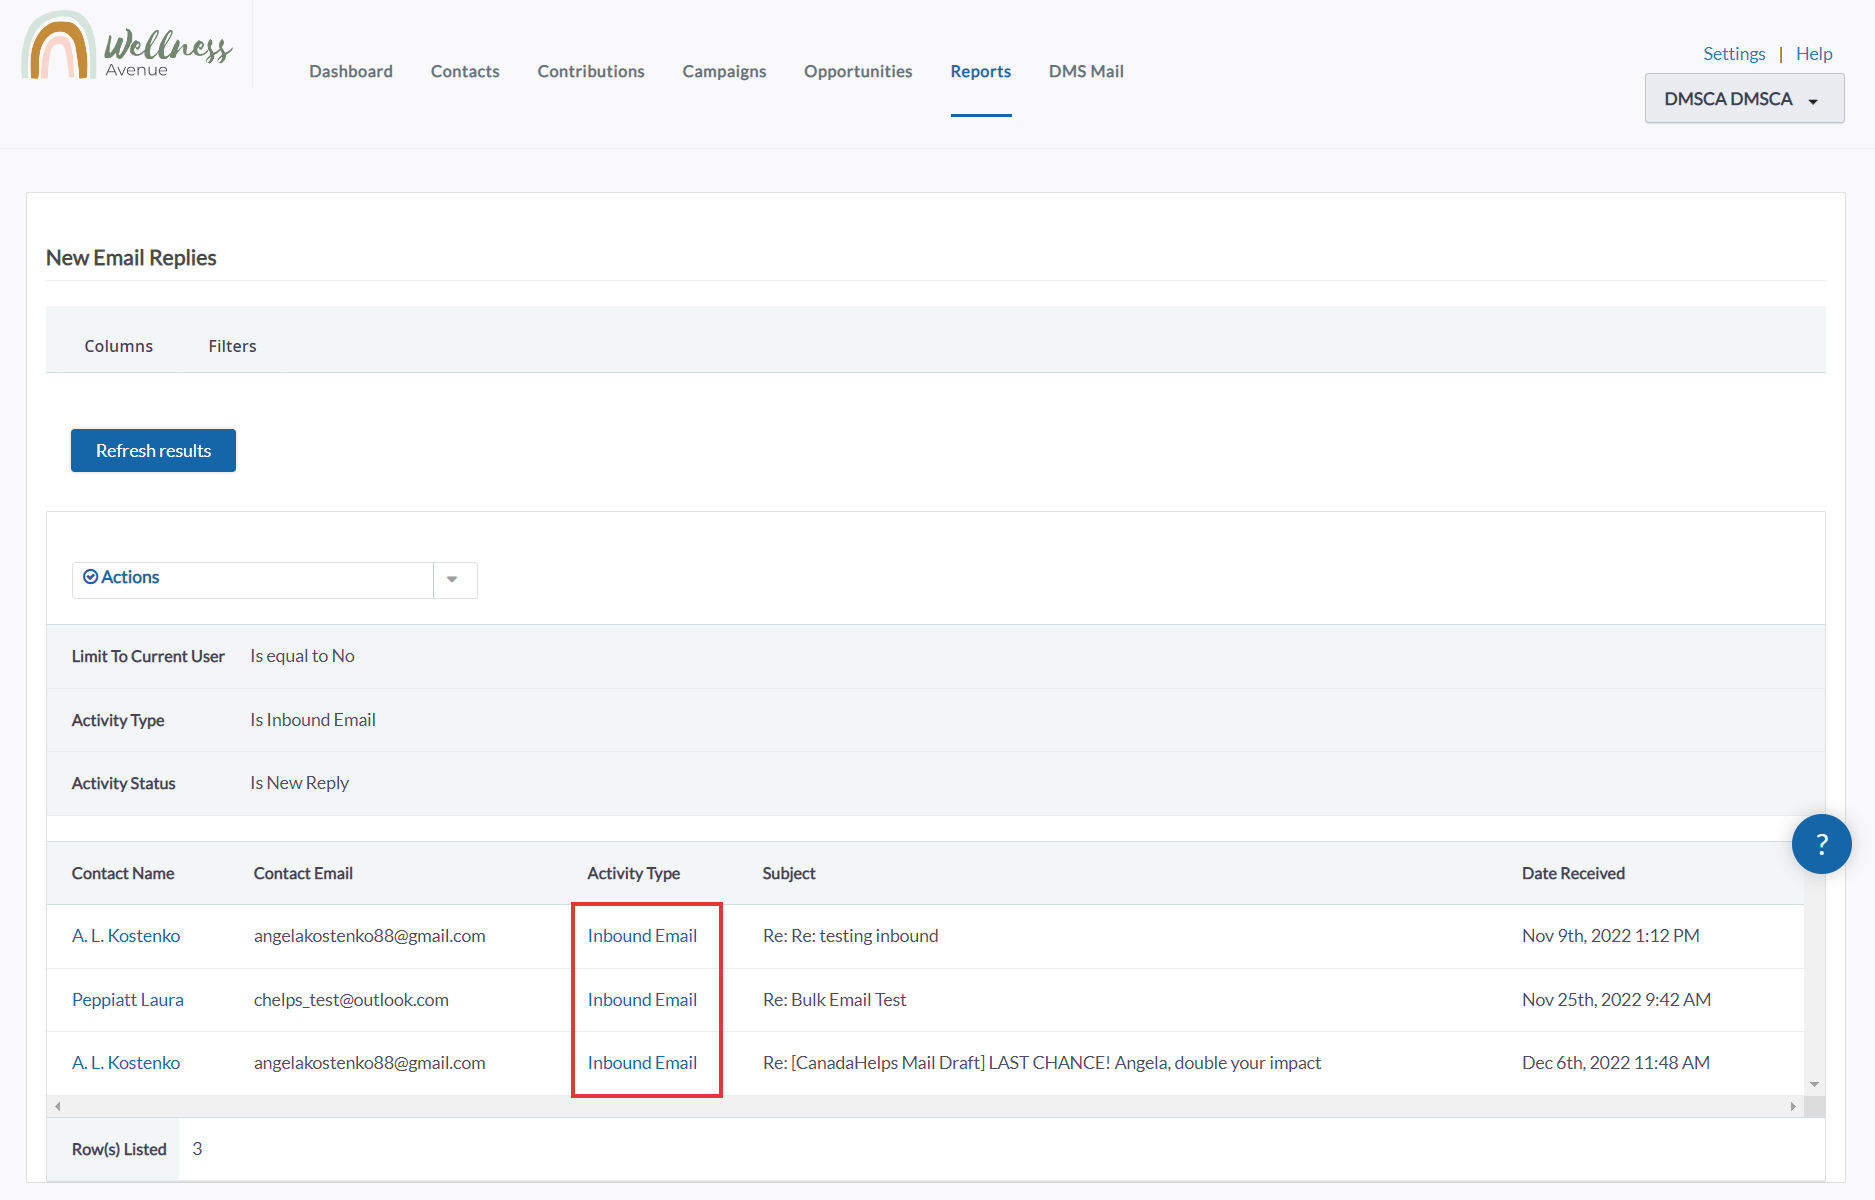 Select Inbound Email for your desired email reply
7. Next, you can read the contents of that email. When ready, select Reply at the bottom right.
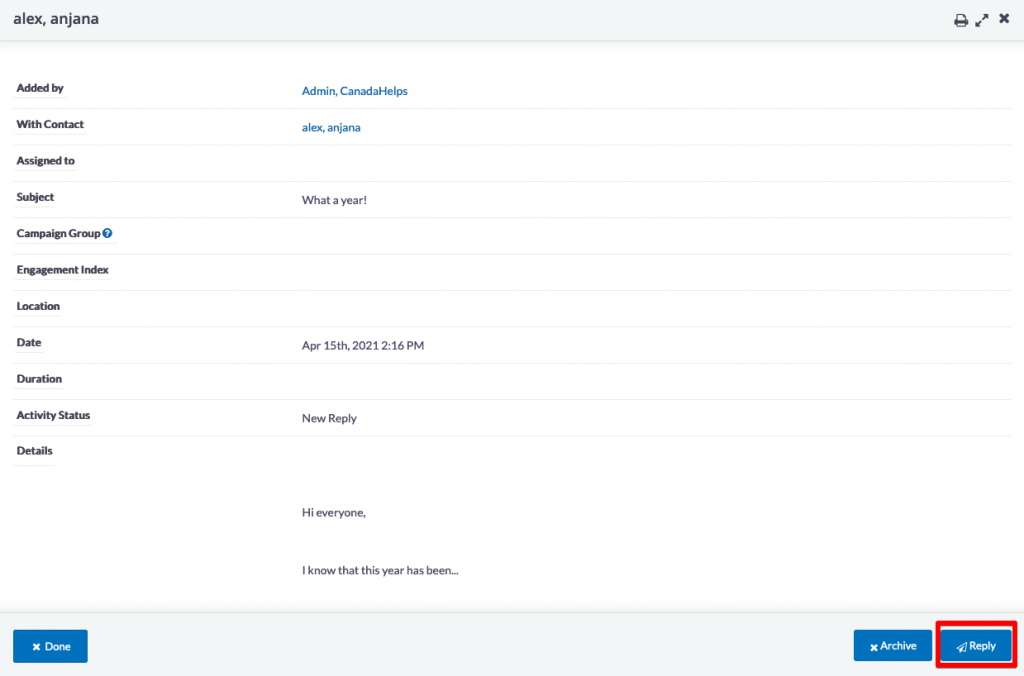 Select Reply
8. On the next page, craft your email. You can use Templates and Merge Fields.
9. Then, select Send Email on the bottom right. Your Contact will receive the email and it will create an Activity related to it on their Contact Profile.
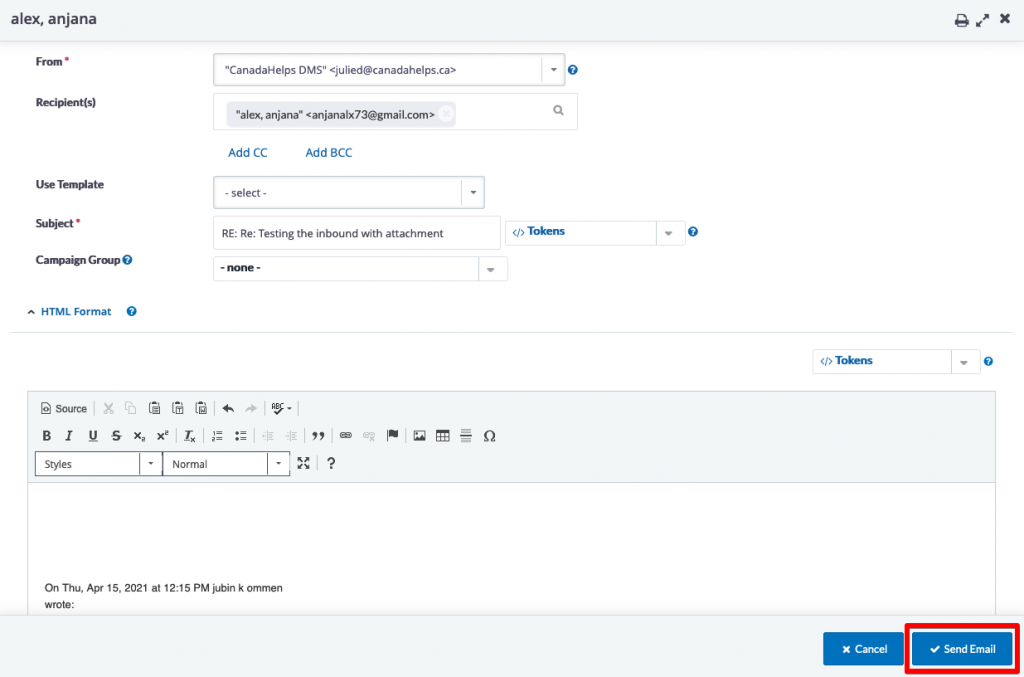 Craft your message and select Send Email
From the Contact Profile
1. Go to the Contacts Tab
2. Search for the Contact you wish to see their Email Replies and select their Name to open their Contact profile
3. On the next page, select Activities
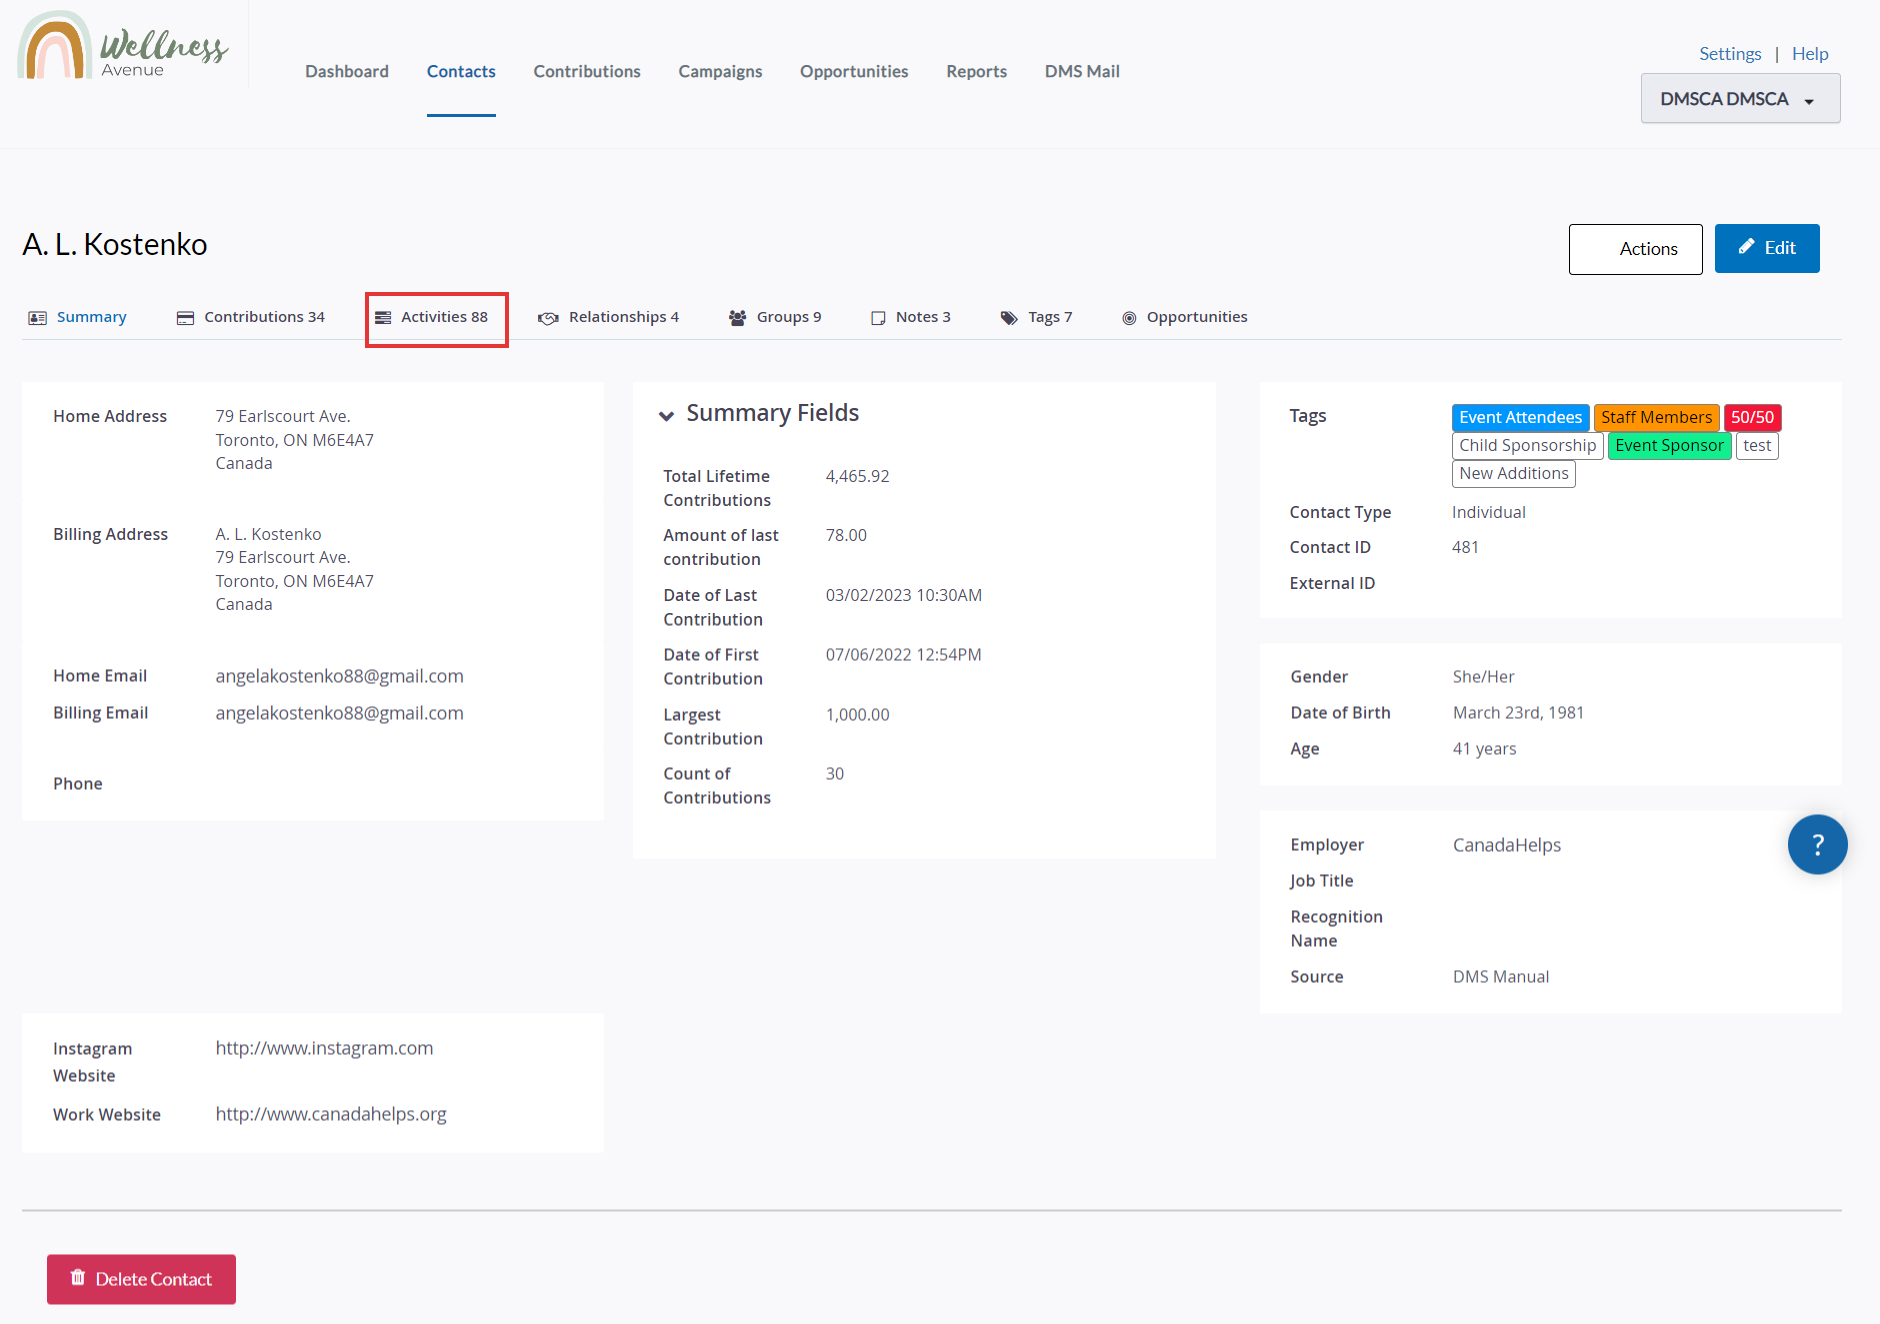 Under their Contact Profile, select Activities
4. You will then see the Email Replies in red (signalling that they are still unread) and with the Type as Inbound Email. You will also be able to filter by this specific Type.
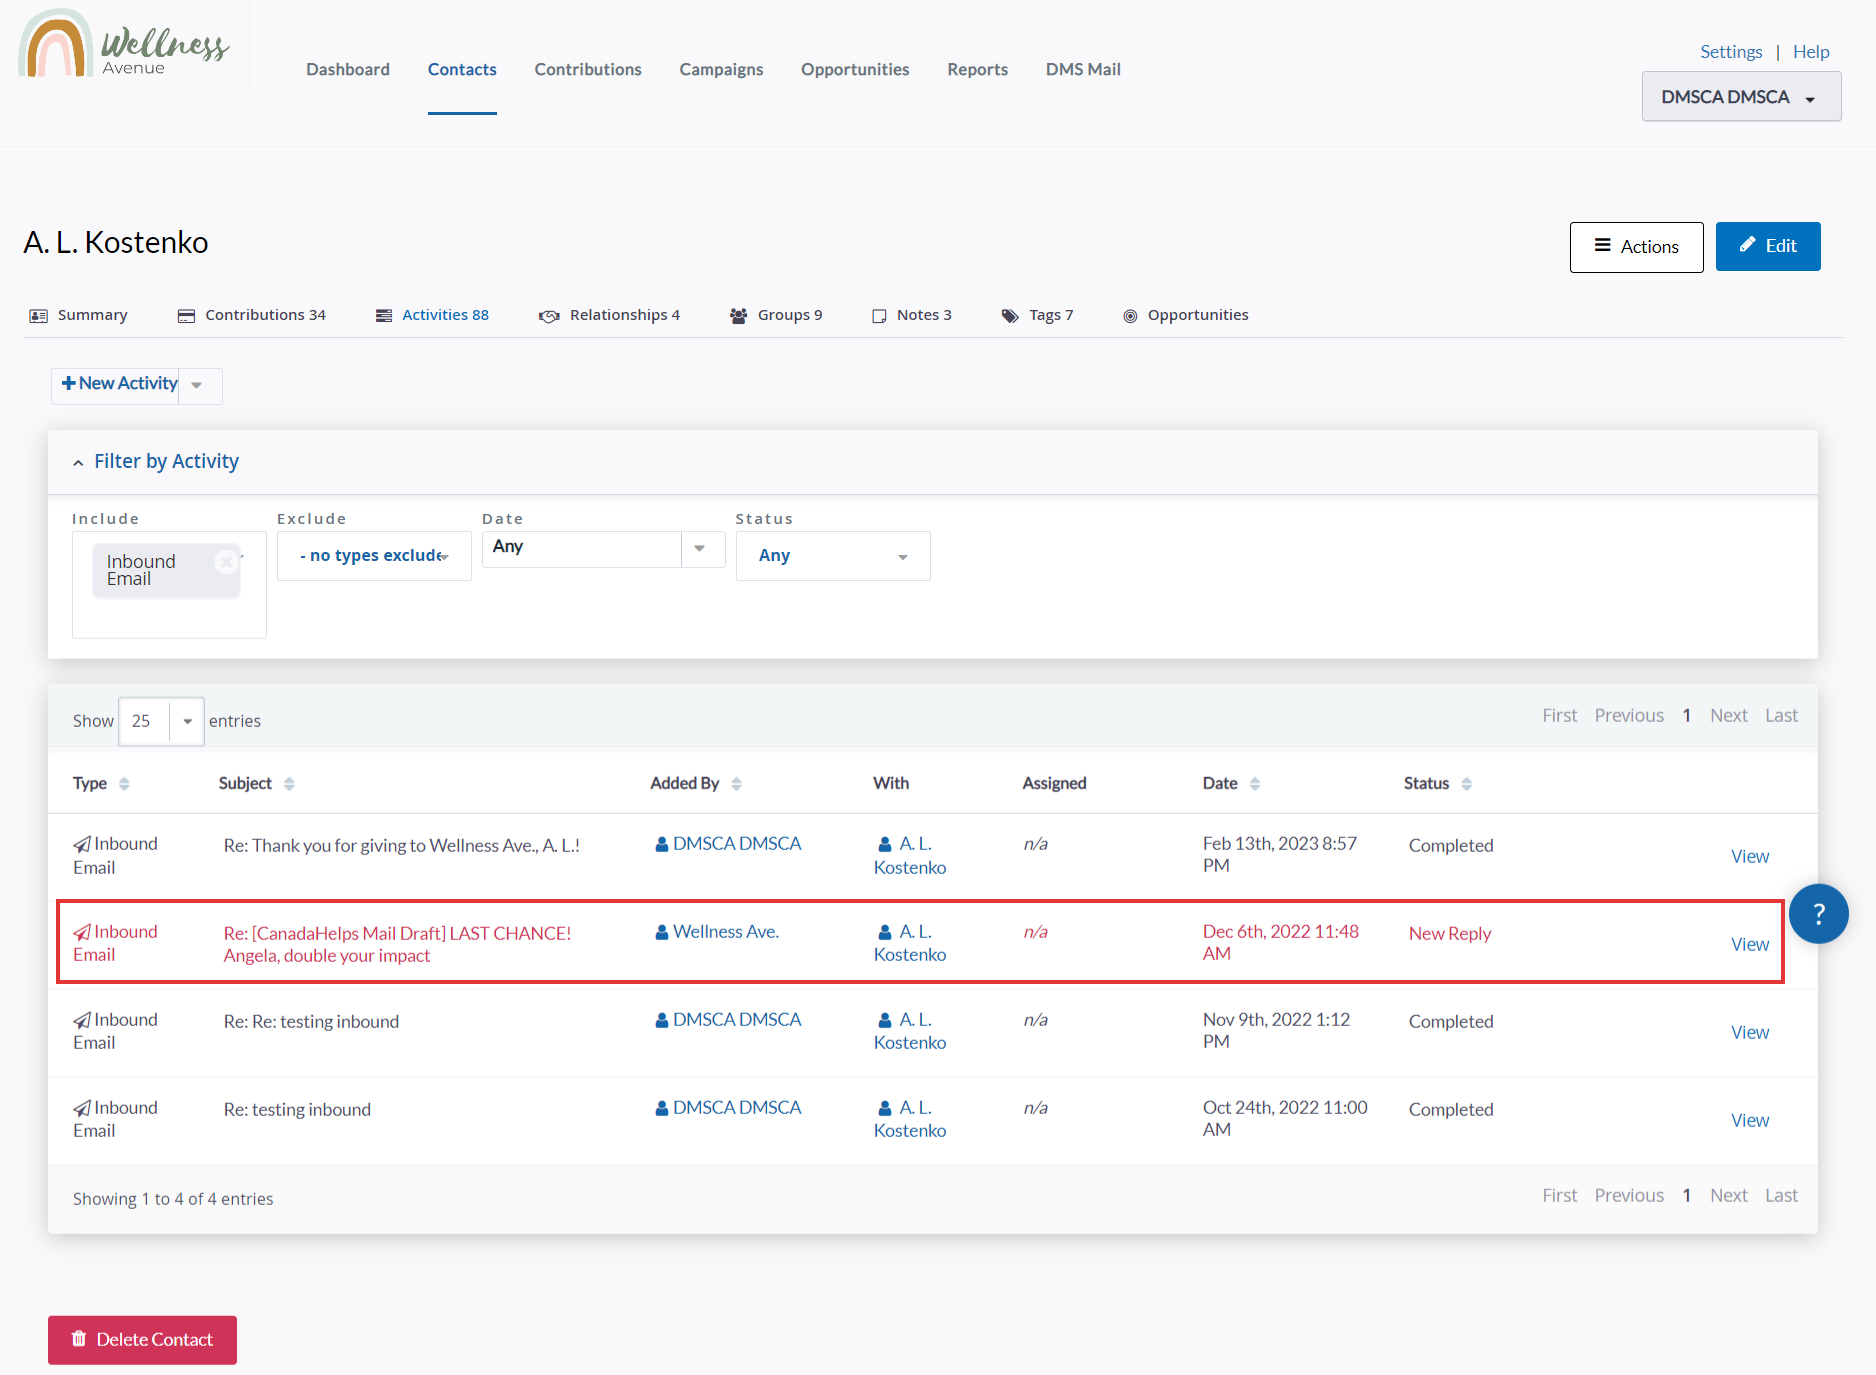 All unread email replies will be displayed in red
5. To view an Email Reply, select View to the right of your desired Email
 Select View for your desired email reply
6. Next, you can read the contents of that email. When ready, select Reply at the bottom right.
 Select Reply
8. On the next page, craft your email. You can use Templates and Merge Fields.
9. Then, select Send Email on the bottom right. Your Contact will receive the email and it will create an Activity related to it on their Contact Profile.
 Craft your message and select Send Email
10. After answering an Email Reply, the email you will be marked as Completed automatically (and change colours from red to black). You can also manually change that specific Activity from New Reply to Completed by hovering your mouse cursor on top of its Status
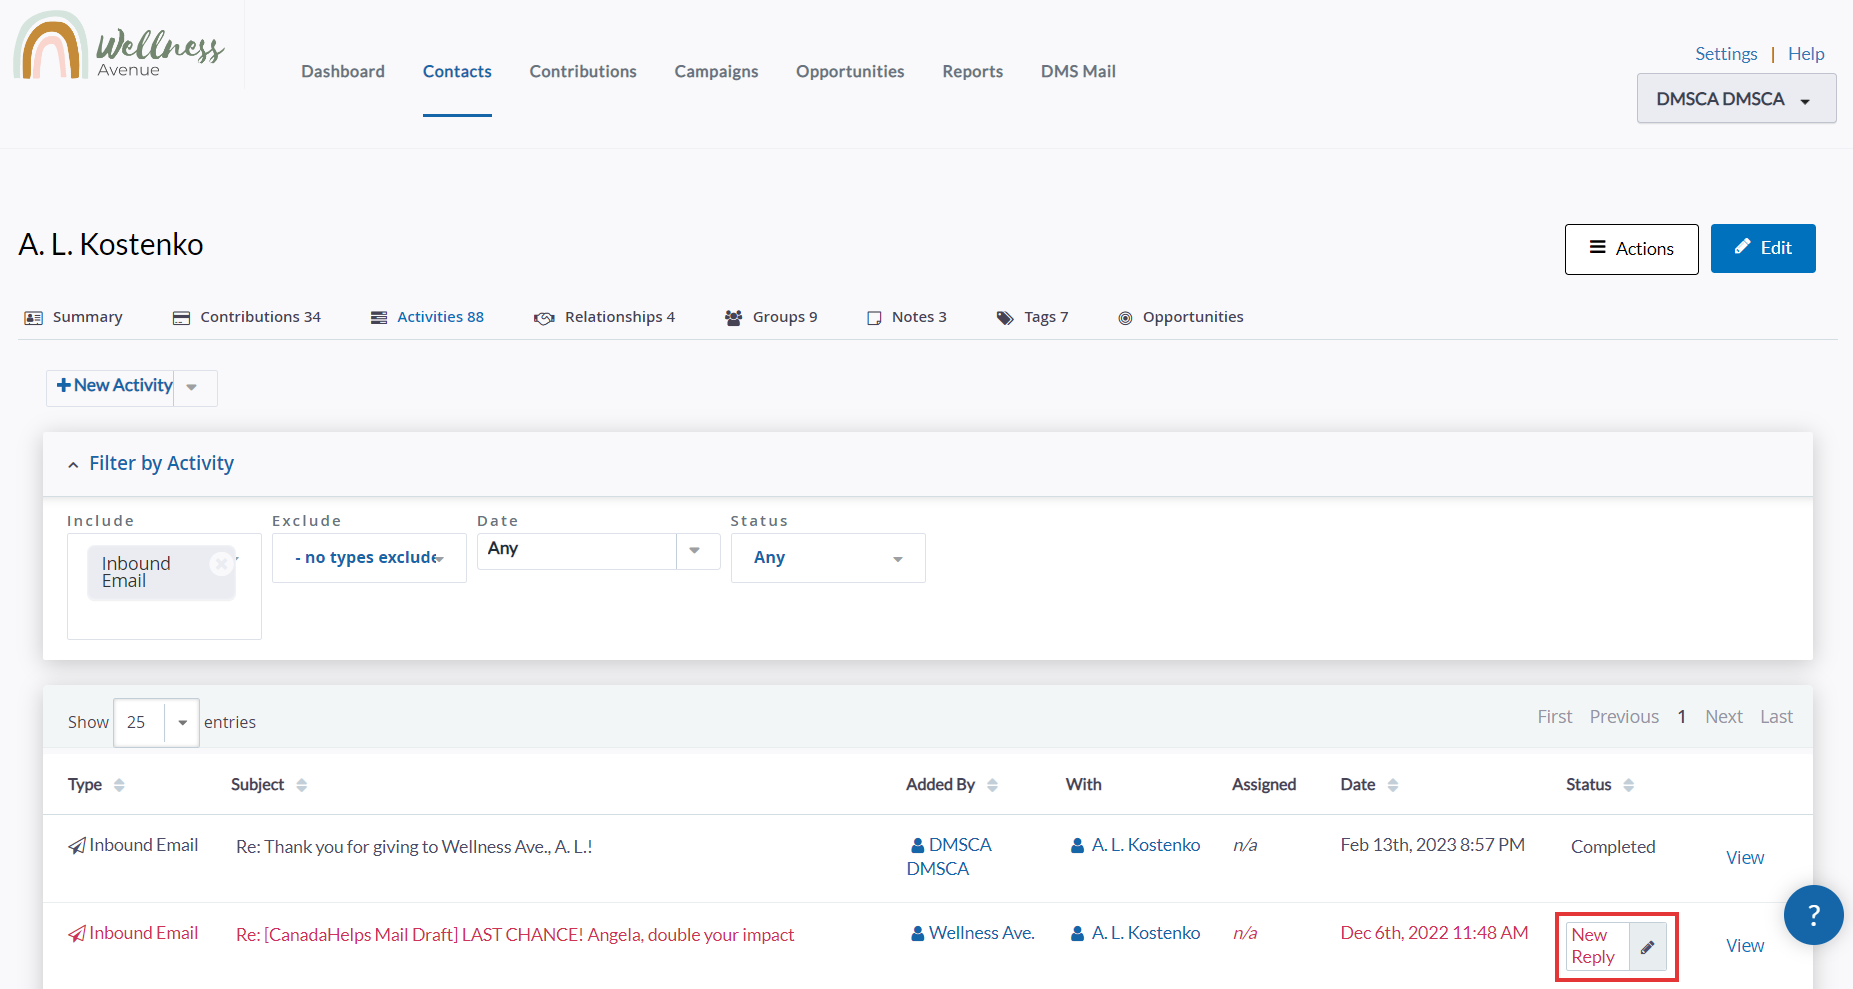 You can manually change the status of the email reply